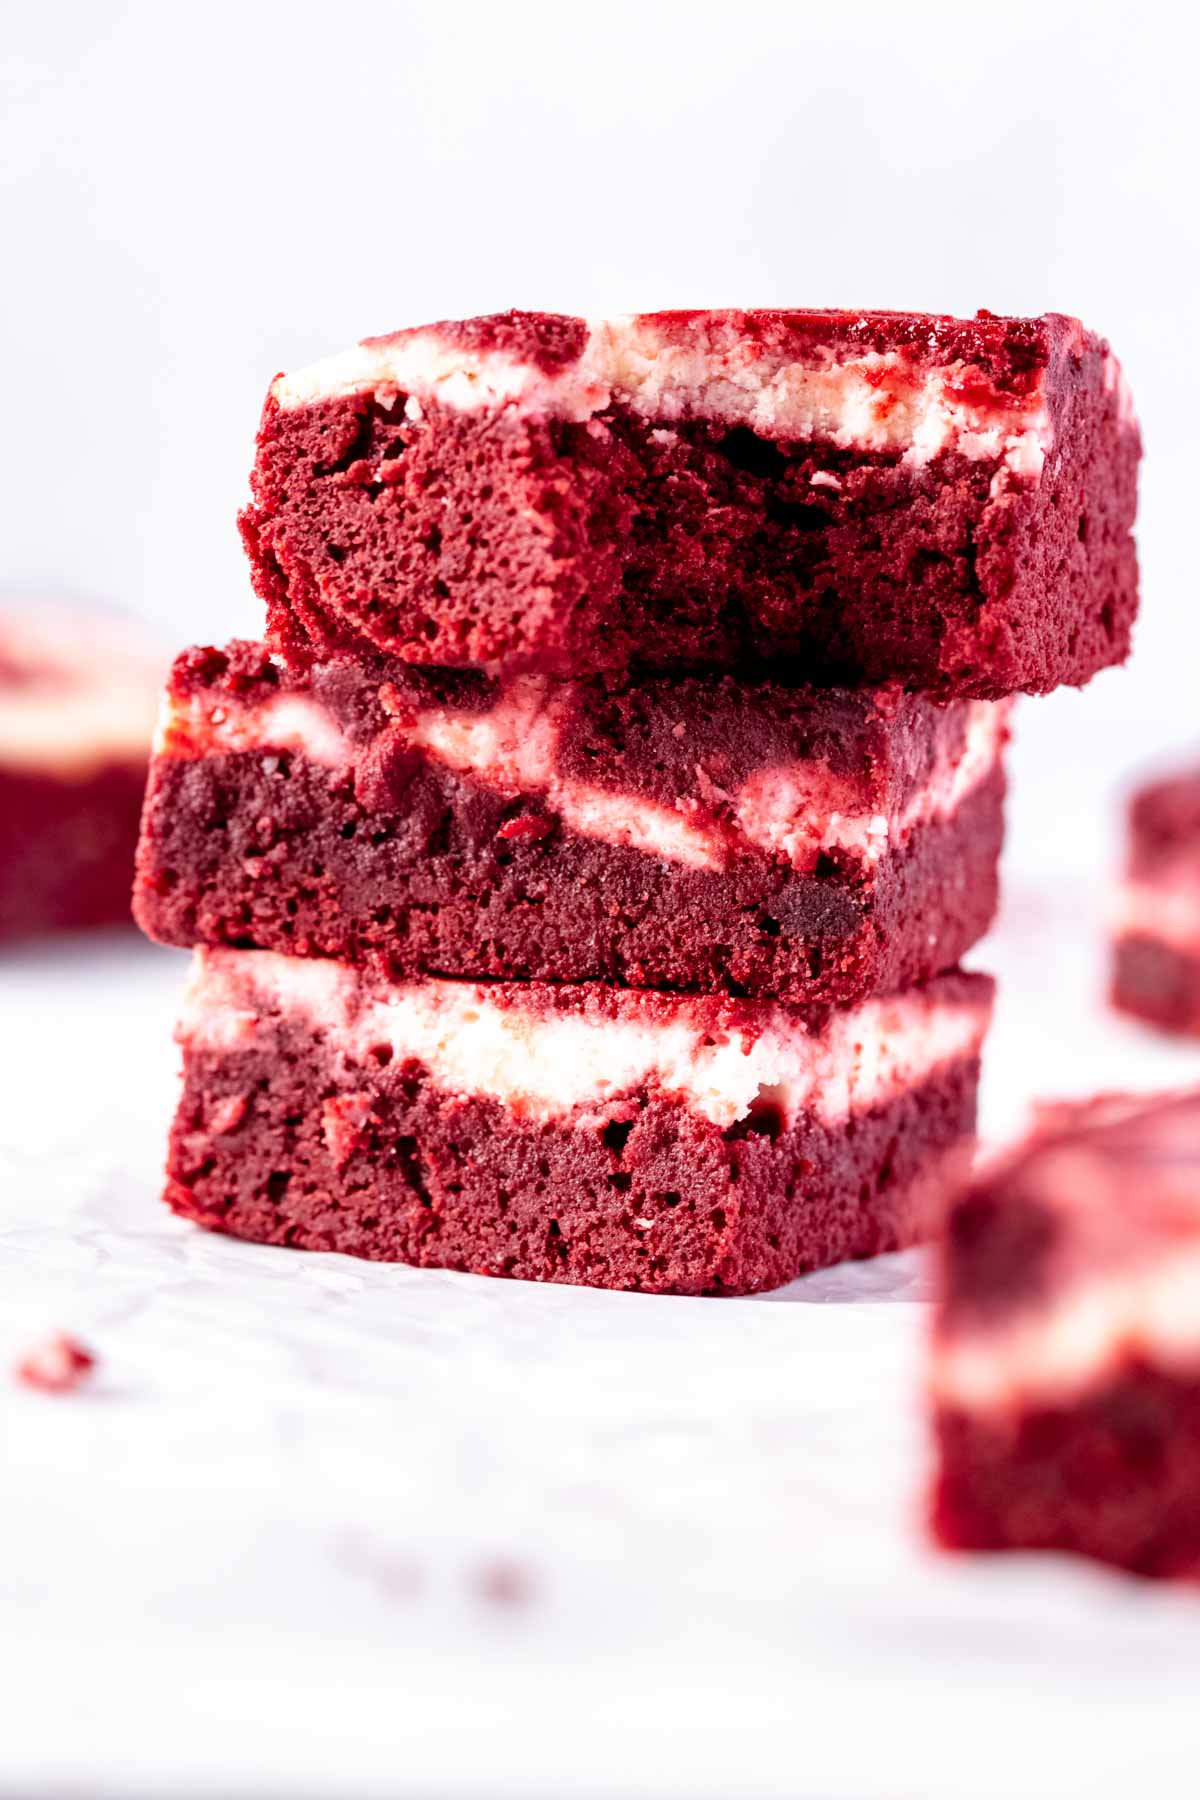
Enjoy red velvet cake in a new way with homemade red velvet swirl brownies. They are perfectly fudgy with a classic red velvet flavor, and to up the fun factor I added a swirl of vanilla cheesecake!
Ingredients & Substitutions
Shop efficiently (treat this as your grocery list) and gather your ingredients at home without running circles in your kitchen. (i.e. One trip to the fridge to get all your dairy needs.) You can still find the full printable recipe at the end of this post.
DAIRY:
- butter. As always, use unsalted butter so you can control the amount of salt. You need 150g or 10.75 tbsps.
- eggs. You need a total of 5 large eggs. 200g (4 large eggs) for the brownie base + another 50g (1 large egg) for the cream cheese layer
- full-fat cream cheese. Use the block ones, not the tub variety. This recipe was tested using the regular cream cheese and not the “light” version. You need 250g (8.82 oz)
PANTRY:
- granulated white sugar. You need 250g (1.25 cups) + another 50g (.25 cup) for the cream cheese layer
- pure vanilla extract. 2 tsps + another 1 tsp for the cream cheese layer. Can also use vanilla bean paste if that is what you have.
- white vinegar. You need 1 tsp. White wine vinegar is okay as well.
- red food gel coloring. ½ tsp – You may need more than 1/2 tsp, depending on the brand you’re using. Ideallly, use good quality gel based food coloring.
- cocoa powder. Use natural ,unsweetened cocoa powder. 30g (6 tbsps)
- all-purpose flour. Also called plain flour. You need 125g (1 cup).


Recommended Tools to Make this Recipe
- 8-inch square pan
- hand mixer
- parchment paper
- cake tester / toothpick / skewer

How To Make Red Velvet Swirl Brownies Step-by-Step
STEP 1. Preheat (convention oven, no fan) oven to 350℉ / 180℃ and line an 8-inch/ 20cm square pan with parchment paper. Ensure that your butter, eggs, and cream cheese are at room temperature.
Related Read: What is Room Temperature Butter
STEP 2. In a medium mixing bowl, blend together (using a whisk or a hand mixer) the cream cheese, vanilla, sugar, and egg until smooth. Set aside while you make the red velvet brownies.
STEP 3. In a large bowl, cream the butter and sugar together until combined. Add the vanilla extract, vinegar, and red food coloring and mix well. Depending on the brand of food coloring you use, you might need to add more food color. Add the eggs, one at a time, beating after each addition.
STEP 4. Add the cocoa powder and flour and beat again UNTIL JUST no streaks of white flour can be seen. Don’t forget to scrape the bowl to ensure all the ingredients are evenly mixed.
STEP 5. Pour the brownie mixture into the line pan then level with a spatula. Gently dollop the cream cheese mixture on top of the brownie batter in the pan. Then using a cake tester or a skewer or the tip of a knife, drag the tip through the cream cheese mixture to create a swirl pattern.

STEP 6. BAKE for 28 to 30 minutes or until a toothpick inserted in the middle of the brownie comes out clean. Transfer to a wire rack to cool fully before cutting with a sharp knife.

Baker’s Notes
- It’s important to use a strong, good-quality red food gel coloring when you make these to get that gorgeous red color.
- You can also use 9-inch square but baking time will be different. Start checking for doneness 5-10 minutes earlier than the suggested baking time below.
- To cleanly cut the brownies, use a straight-edge knife rather than a serrated knife. I use a chef’s knife that’s at least 8-inches long. If you use a knife that’s too small, you’ll end up with crumbs everywhere. Run the knife under hot water and wipe it off in between EACH slice to prevent smearing the edges of the brownies.
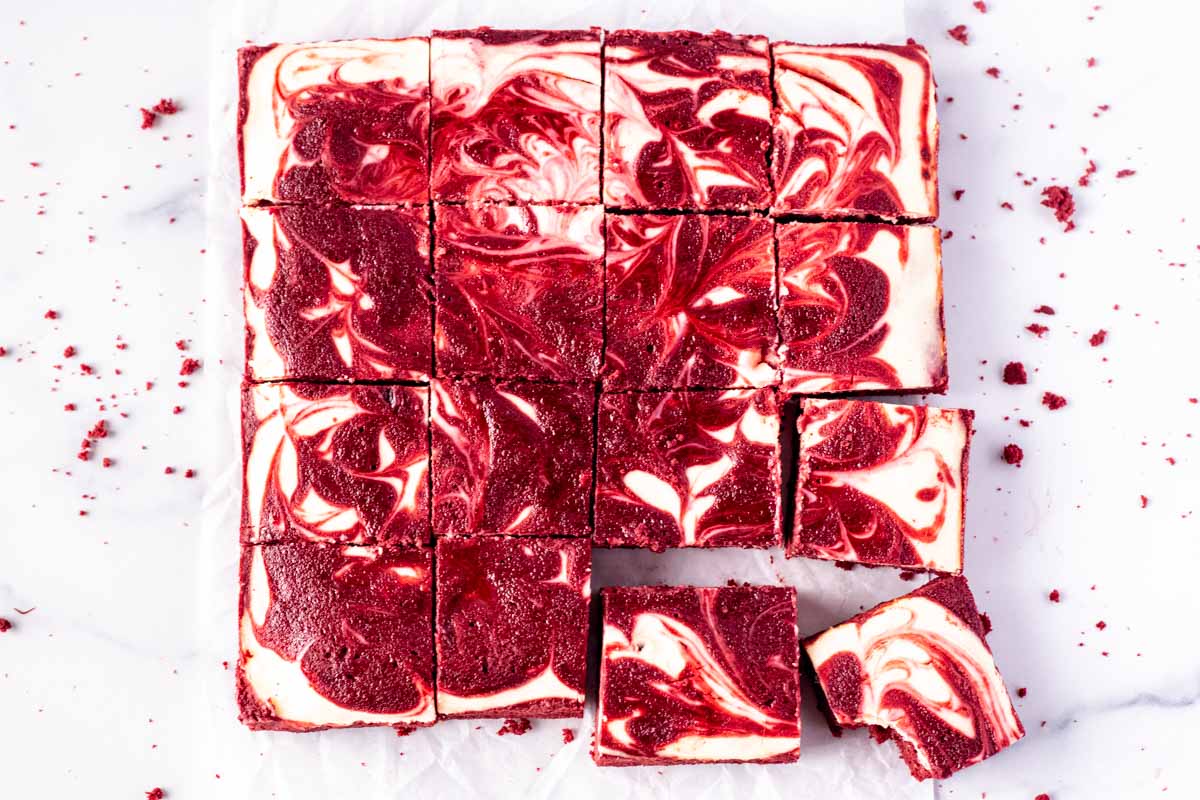
- As shown in the the photos, you can make 4 even cuts into this 8×8-inch pan of brownies for a total of 16 brownies. You can also do 3 even cuts to get 9 generous portioned brownies.

❤️ Tried this recipe and loved it? If you made this recipe or any other recipe on this site, please leave a ⭐️⭐️⭐️⭐️⭐️ rating + review below – or tag @thebakeologie on Instagram and hashtag it #bakeologie !
Equipment
- 8-inch (20cm) square pan
- Parchment Paper
- hand mixer or stand mixer
- cake tester or a toothpick/ skewer
Ingredients
For the Red Velvet Base
- 150 g unsalted butter at room temperature
- 250 g granulated white sugar
- 2 tsp pure vanilla extract
- 1 tsp white vinegar
- ½ tsp red food gel coloring
- 4 pcs large eggs weight is around 200g without shell
- 30 g cocoa powder
- 125 g all-purpose flour/ plain flour
For the Cream Cheese Swirl
- 250 g full-fat cream cheese at room temperature, get the block ones, not the spreadable type
- 1 tsp pure vanilla extract
- 50 g granulated white sugar
- 1 pc large egg weight is around 50g without shell
Instructions
- MISE EN PLACE. Preheat (convention oven, no fan) oven to 350℉ / 180℃ and line an 8-inch/ 20cm square pan with parchment paper. Ensure that your butter, eggs, and cream cheese are at room temperature.
- MAKE THE CREAM CHEESE LAYER. In a medium mixing bowl, blend together (using a whisk or a hand mixer) the cream cheese, vanilla, sugar, and egg until smooth. Set aside while you make the red velvet brownies.250 g full-fat cream cheese1 tsp pure vanilla extract50 g granulated white sugar1 pc large egg
- MAKE THE RED VELVET BROWNIE. In a large bowl, cream the butter and sugar together until combined. Add the vanilla extract, vinegar, and red food coloring and mix well. Depending on the brand of food coloring you use, you might need to add more food color. Add the eggs, one at a time, beating after each addition.150 g unsalted butter250 g granulated white sugar2 tsp pure vanilla extract1 tsp white vinegar½ tsp red food gel coloring4 pcs large eggs
- Add the cocoa powder and flour and beat again UNTIL JUST no streaks of white flour can be seen. Don't forget to scrape the bowl to ensure all the ingredients are evenly mixed.30 g cocoa powder125 g all-purpose flour/ plain flour
- MAKE THE SWIRL. Pour the brownie mixture into the line pan then level with a spatula. Gently dollop the cream cheese mixture on top of the brownie batter in the pan. Then using a cake tester or a skewer or the tip of a knife, drag the tip through the cream cheese mixture to create a swirl pattern.
- BAKE for 28 to 30 minutes or until a toothpick inserted in the middle of the brownie comes out clean. Transfer to a wire rack to cool fully before cutting with a sharp knife.