Fruit Danish – flaky, creamy, sweet, tart, and bursting with flavor. Using frozen puff pastry, pastry cream, and jammy blueberry topping, these are definitely a crowd pleaser. Perfect for a special weekend or brunch. Get creative with other fruits for a personalized, delicious treat!

Today, we’re diving into the world of pastries with an easy Fruit Danish recipe. This treat combines the flaky, buttery goodness of puff pastry with the rich, velvety smoothness of pastry cream, all crowned with juicy, sweet blueberries.
Don’t feel limited to blueberries —this versatile recipe can be made with a variety of fruits. Imagine the delicate tartness of raspberries, the tropical sweetness of mangoes, or the crisp, refreshing bite of apples gracing your Danish. The possibilities are endless, and each variation promises a burst of flavor wrapped in a golden, flaky crust!


Ingredients & Substitutions
Shop efficiently (treat this as your grocery list) and gather your ingredients at home without running circles in your kitchen. (i.e. One trip to the fridge to get all your dairy needs.) You can still find the full printable recipe at the end of this post.
Aside from the puff pastry and fresh blueberries, the ingredients listed below will be used to make pastry cream.
REFRIGERATED:
- butter. 10g (1 tbsp) of cold unsalted butter
- egg yolk. You need 50g of egg yolks. That’s the yolk from about 3 large eggs.
- egg. 1 large egg + 2 tsp water or milk (for egg wash)
- milk. 240g (1cup) of milk (preferably full-fat/ 3.25% milk fat). You can also use skim milk.
- frozen puff pastry. You can find puff pastry in a rectangular shaped box in the freezer section of the grocery store. In the US, Pepperidge Farm is the most widely accessible brand in grocery stores. Trader Joes has a fantastic all-butter version that works beautifully as well. You need 1 box/ pack.
PANTRY:
- white sugar. 60g (4 tablespoons ) of white granulated sugar
- flour. 20g (2½ tablespoons) of all-purpose flour. I urge you to measure by weight, but if measuring by cup, you would need XXX cup measured through spooned and leveled method.
- vanilla. 1/4 tsp pure vanilla extract. If you want to see those vanilla bean specks, you need half of a vanilla bean pod or you can also use 1/4 tsp of vanilla bean paste.
- canned blueberry pie filling. This is optional. I just love its thick, syrupy sauce. You only need about 1-2 cups, depending on how much filling you want to put in your danish. I use this brand because it has no preservatives and artificial flavors.
PRODUCE:
- blueberries. 454g (1 lb) of fresh blueberries. Easily replace it with any fresh fruit you like – raspberries, blackberries, peaches, mangoes, raspberries, etc.
How To Make Fruit Danish Step-By-Step
There’s three components for this danish pastry: The puff pastry, the pastry cream, and the filling.

First we’ll make the pastry cream because it needs time to cool down a bit before we can use it. My pastry cream recipe gives you a smooth and creamy custard. It goes so well with any fruit!
Then we’ll work on our puff pastry and form them into a twisted diamond shape. The puff pastry is store-bought so make sure to follow the box instructions on how to thaw it. Usually I transfer it from the freezer to the fridge overnight, or leave it out at room temperature for 30 minutes to an hour. When working with it, it should be thawed enough to fold open and roll, but not too soft.
While our puff pastry is baking in the oven, we’ll do the final step, which is making the fruit filling. You can actually just top it with sliced fresh fruits, then you’re done. But I like an intense fruity taste so I’ve added a secret ingredient which I’ll share in a short while.
A. Make the Pastry Cream (Crème Pâtissière )

Learning how to make pastry cream (also called Crème Pâtissière in the culinary world) is incredibly useful for any home baker. This versatile, rich, and creamy filling can elevate a variety of desserts, from tarts and eclairs to cream puffs, crepes, and cakes.
Don’t be fooled by its fancy name because it’s actually easy to make! I’ve included the recipe below, but if you want an in-depth tutorial on this you can head on to this article.
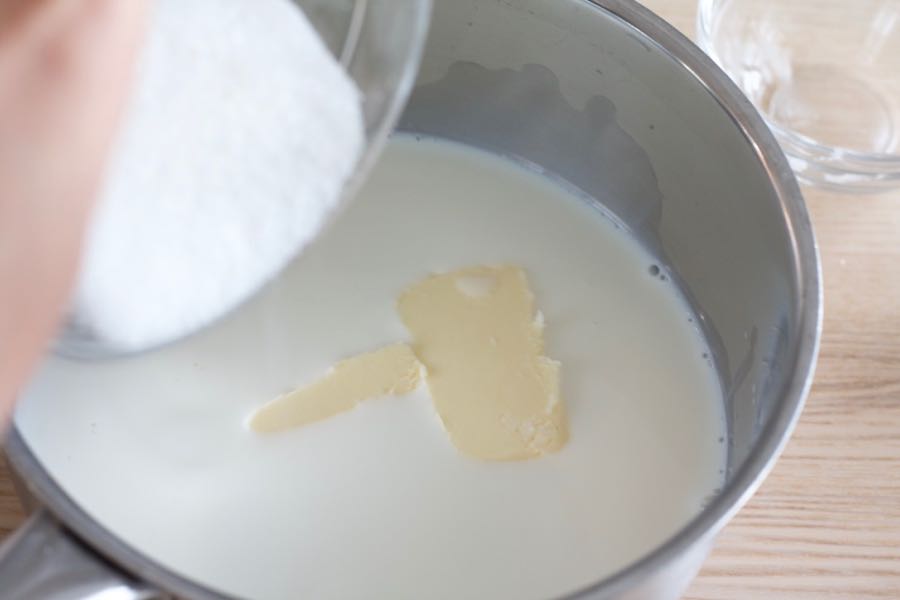
STEP 1. Heat the milk mixture. In a medium saucepan, combine milk, butter, and 1/4 of the sugar (just eyeball it). If using a fresh vanilla bean, infuse the milk by scraping out the seeds and adding them into the saucepan. If using vanilla extract, you will add them later at step 5.
Set the milk mixture over medium heat and bring to a simmer.
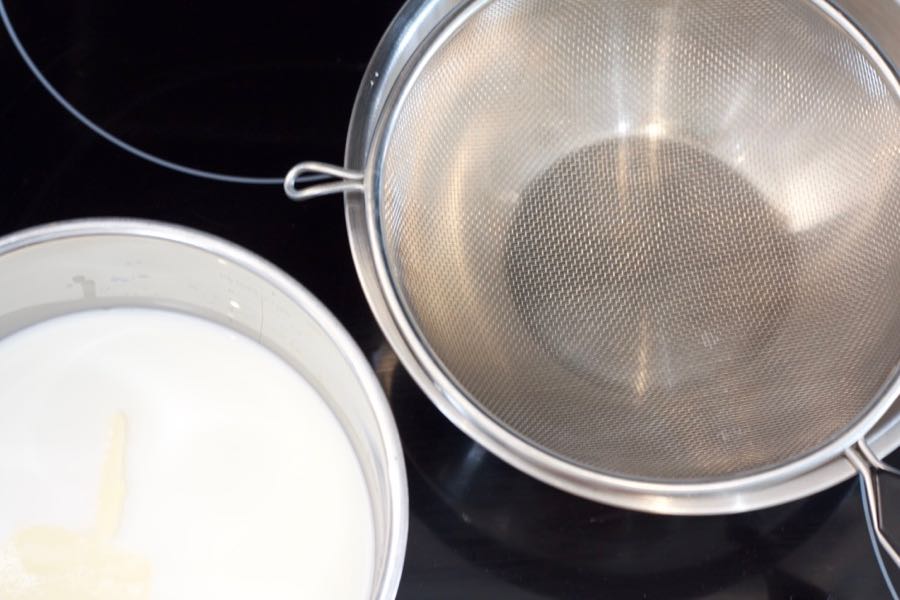
TIP: At this point, it is a good idea to set a strainer over a bowl and place it near the stove. You will not use this until step 5 but the egg yolks cooks pretty quickly so it is important to have this ready.
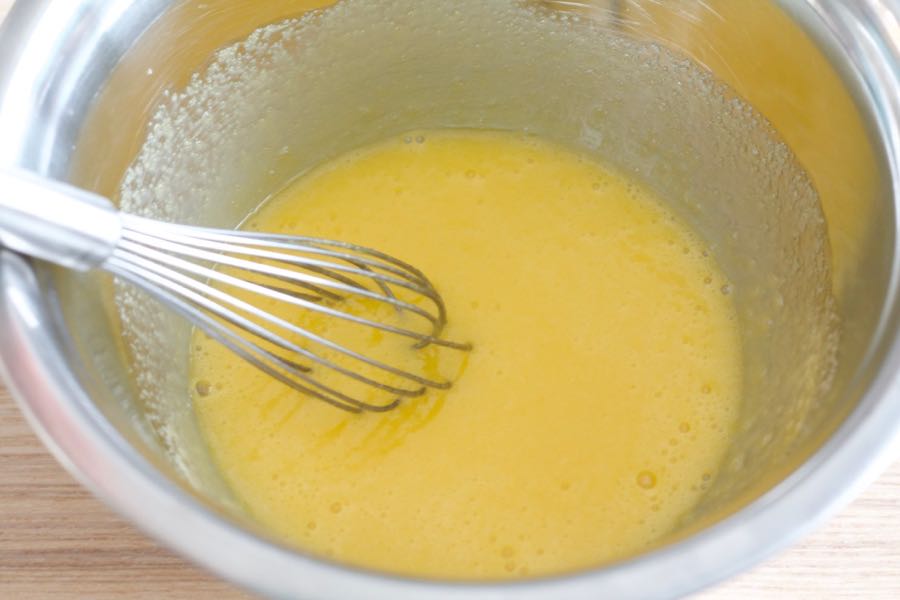
STEP 2. Make the egg mixture. While waiting for the milk mixture to simmer, whisk together the egg yolks and the remaining 3/4 of the sugar in a separate bowl.
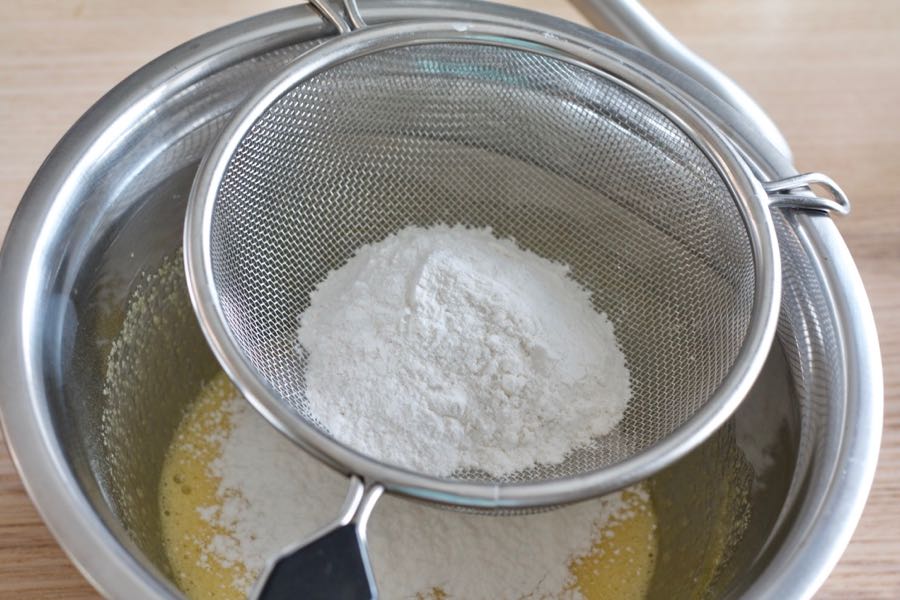
Add the sifted flour to the egg yolk mixture. Mix again until smooth. Set aside.
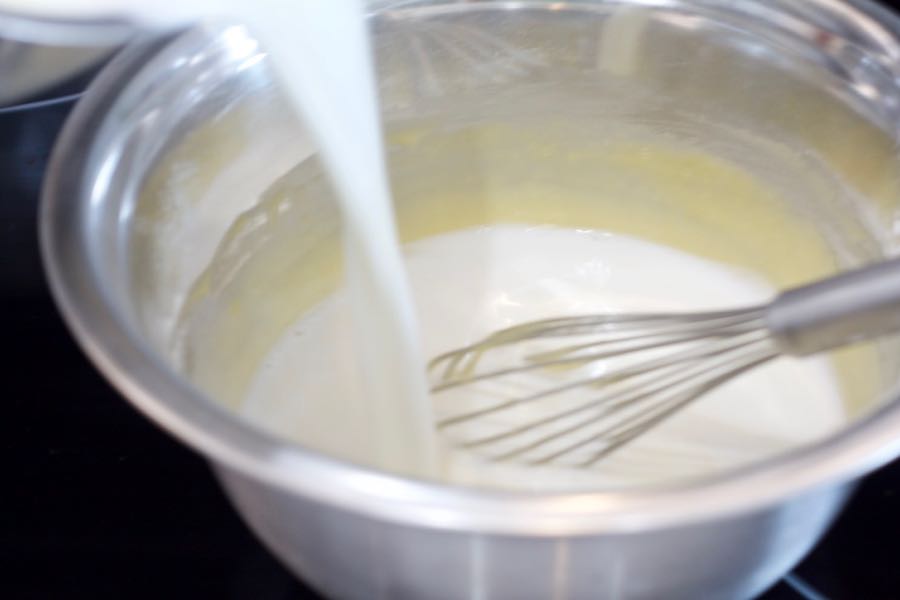
STEP 3. Temper the egg mixture. Tempering is a culinary technique used to stabilize certain ingredients or mixtures, especially in the context of chocolate and eggs, by carefully controlling temperature. If we just simply dump the eggs in the warm milk mixture, you would get small pieces of scrambled eggs.
To temper eggs, gradually mix a small amount of the hot milk into the beaten eggs while constantly stirring. This slowly raises the temperature of the eggs, preventing them from cooking too quickly and curdling.
Continue pouring half of the milk mixture slowly into the eggs, whisking thoroughly between additions.
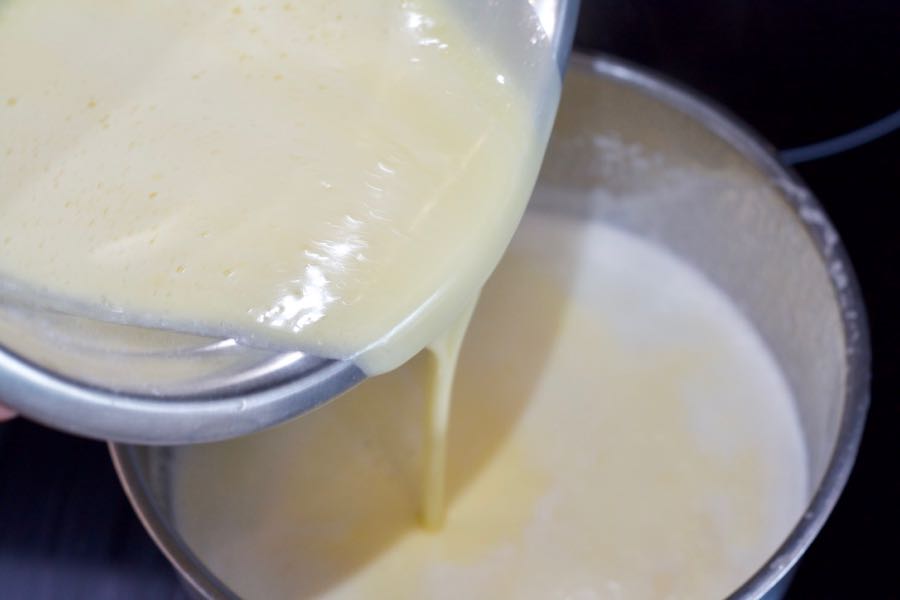
At this point the eggs are warmed and can be safely poured back into the saucepan without the risk of cooking and curdling.
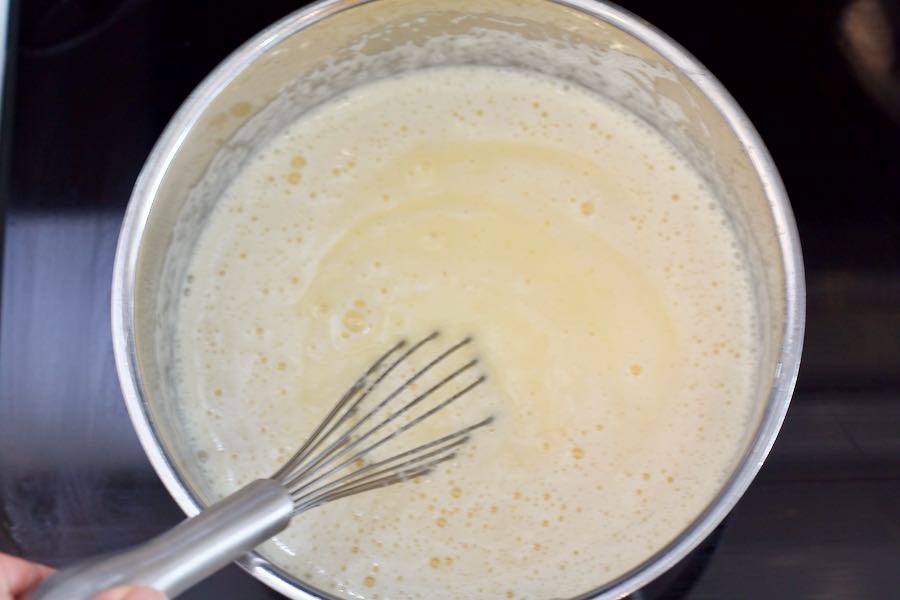
STEP 4. Cook the pastry cream. Still over medium-low heat, continue to whisk the mixture until it thickens. Whisk in the lumps until the pastry cream is smooth. When it has thickened to a pudding-like consistency, pause whisking every few seconds to check if the cream has come to a boil.
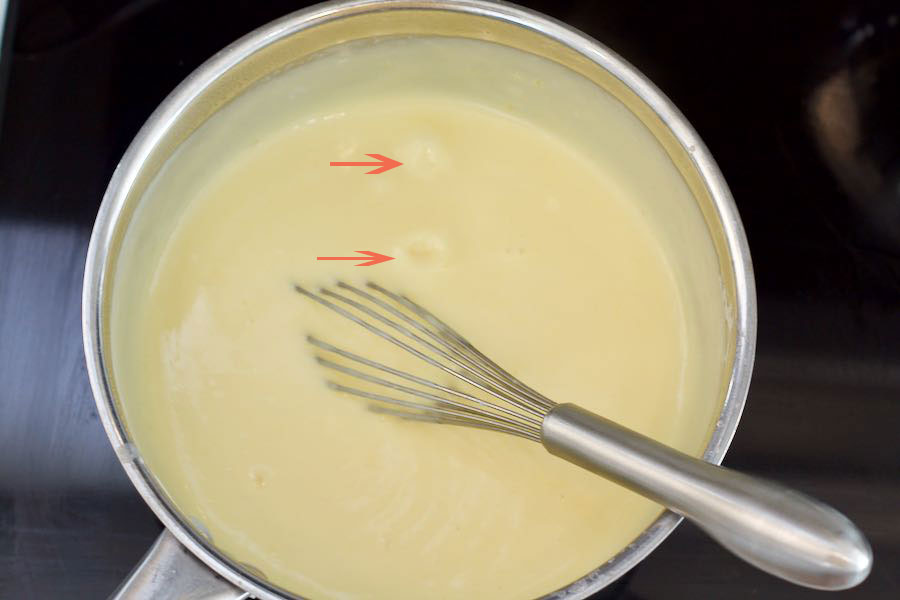
Once you see large bubbles popping on the surface (refer to photo below), whisk for about 10 more seconds then remove the pan from heat.
STEP 5. Add flavorings. Add the vanilla extract/ vanilla bean paste. Stir until it has been evenly distributed.
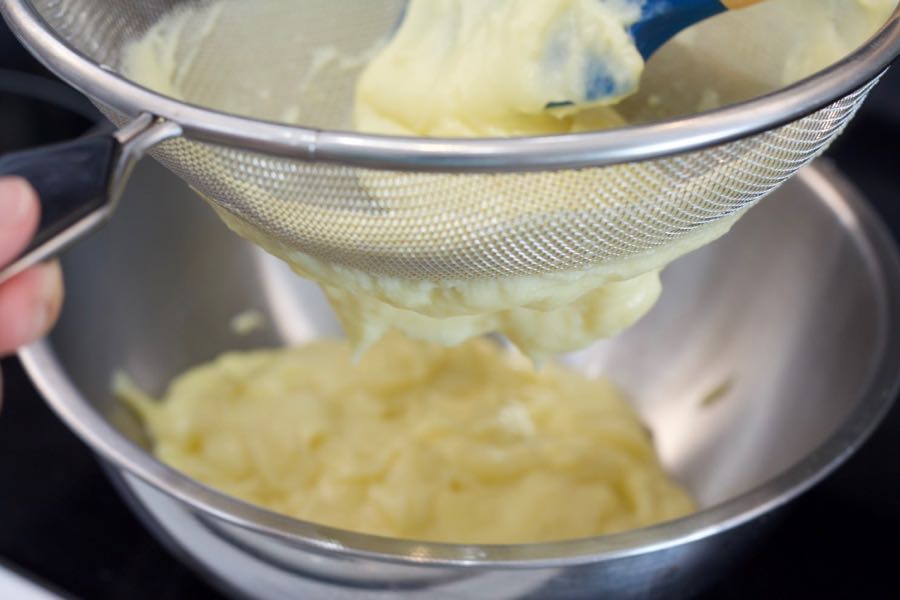
STEP 6. Strain the pastry cream. This is the secret to a smooth, creamy, and lump-free pastry cream! Pour the cream into the strainer set over the bowl. Push it through the strainer using a spatula. This is to ensure that there are no bits of cooked eggs and any lumps that may be in your pastry cream.
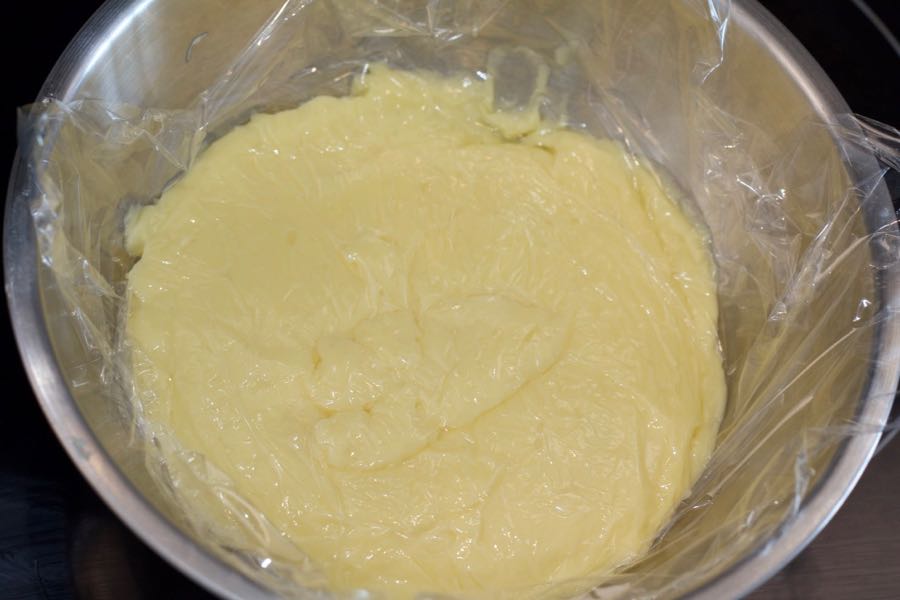
STEP 7. Cover and cool. Immediately cover the pastry cream with a piece of plastic wrap pressed against the surface of the cream to prevent a skin from forming. Let it cool in the fridge for about 1 to 2 hours before using.
B. Prepare the Puff Pastry
The trick to making this danish recipe simple is using frozen puff pastry. I love making things from scratch, but puff pastry is one I’ll gladly take. It’s just as good as homemade, if not better, and saves SO MUCH time.
It’s also a great ingredient just to keep on hand. Since it comes frozen, you can store it for months and quickly thaw out a sheet whenever you need it.
When working with it, it should be thawed enough to fold open and roll, but not too soft. Follow the instructions in the box on how to thaw it properly. It should still be cold and not at room temperature. If it’s too soft or sticky to handle, return in the fridge for about 15 mins.
The key to delicious puff pastry is the chilled butter between each layer. That’s why you want to keep the puff pastry as cold as possible, while still giving it enough warmth to work with.

Once your store-bought frozen puff pastry is thawed, let’s start shaping them.
Preheat your oven at 400F (205C).
Working with one sheet of puff pastry at a time, cut into 6 equal squares. The more perfect the squares are, the easier it will be to shape the danish. Measure with a ruler if you like. (Photo 1 below)
Use a sharp knife to cut two a square border, leaving the top left corner and bottom right corner of dough connected (Photo 2).
Fold one of the cut slits over to the opposite side. (Photo 3) Then fold the other slit over to the opposite side. (Photo 4) This should create a nice twisted diamond shape. (Photo 5)
Score the middle area with a fork to prevent it from rising too much. (Photo 6)


Lightly brush the edges with an egg wash. Whisk together the egg with 2 teaspoons of milk or water and use a pastry brush to apply. (Photo 7) This helps the edges turn golden brown and glossy once baked.
Bake on the middle rack of the oven for 20-25 minutes, until evenly puffed with golden brown edges. (Photo 8)
C. Make The Fruit Filling
You can simply top this with fresh blueberries and you’re done. But I like to have an intense fruit flavor so I am amping it up using canned pie fillings (I like this brand because it has no artificial colours or flavours and no preservatives). This is also great if your blueberries are not particularly sweet.
Purée about 1 cup of blueberry pie filling using an immersion blender – you should get a a thick, syrupy sauce. Add fresh blueberries and mix until they’re all coated with the sauce. Now filling is done!
Other Great Filling Ideas: Sliced fresh fruits, jam or fruit preserves, pumpkin butter, apple butter, lemon curd, sliced canned peaches, even Nutella! You need 2 heaping teaspoons per pastry. Feel free to mix and match, making different flavors in your batch.

D. Assemble the Fruit Danish
Here comes the fun part, assembling all the three components into a mouthwatering pastry treat!

Press down the middle of the baked pastry to create a well for your fillings. Place about 1-2 tablespoons of pastry cream and then top with our blueberry filling. Optional step is to drizzle with icing.
To make the icing, simply whisk together 1/4 cup powdered sugar/icing sugar and 1/2 teaspoon of water, milk or lemon juice.


Tips On Making Easy Fruit Danish
- Keep your puff pastry cold. Puff pastry is full of butter and has really a high fat content. The more you handle the dough, the warmer the butter gets, and it begins to melt. When the butter melts, the dough gets really sticky and is very difficult to work with and handle.
- If the dough does start sticking and melting, just place it back in the fridge or freezer for about 10 minutes to allow the butter int he dough to firm back up.
- Pastry cream can be made ahead and stays good for up to 5 days in the fridge. After that, it may start to weep. They become lumpy once refrigerated. Before using, take it out from the fridge for about 30 mins then whisk it until it becomes smooth again.
- These Danish pastries are to be served fresh because that’s when the pastry is extra flaky and crispy. Trust me you won’t want to have just one! But if you do end up with extras, store the Danish at room temperature in an airtight container for up to 2 days. I found that when they’re stored in the fridge, the puff pastry loses a lot of the crispness.
- If you have a toaster oven, warm them back up to revive some of the flakiness. You could also bake on a sheet tray for about 3 minutes in a 300F oven.

❤️ Tried this recipe and loved it? If you made this recipe or any other recipe on this site, please leave a ⭐️⭐️⭐️⭐️⭐️ rating + review below – or tag @thebakeologie on Instagram and hashtag it #bakeologie !
Fruit Danish
Ingredients
For the Pastry Cream
- 240ml (1 cup) whole/ full-fat milk
- 14g (1 tbsp) unsalted butter
- 60g (4 tbsps) granulated white sugar
- 50g egg yolks (around 3 egg yolks)
- 20g (2½ tbps) all-purpose flour sifted
- ¼ tsp pure vanilla extract or vanilla bean paste
Puff Pastry
- 1 box frozen puff pastry (thawed) usually comes in 2 individual sheets that are 10×10 inches each
- 1 large egg + 2 tsp water or milk (for egg wash)
For the Fruit Filling
- 1 cup blueberry pie filling (optional)
- 454g (1 lb) fresh blueberries
Instructions
Make The Pastry Cream
- Heat the milk mixture. In a medium saucepan, combine milk, butter, and 1/4 of the sugar (just eyeball it). If using a fresh vanilla bean, infuse the milk by scraping out the seeds and adding them into the saucepan. If using vanilla extract, you will add them later at step 5. Set the milk mixture over medium heat and bring to a simmer.TIP: At this point, it is a good idea to set a strainer over a bowl and place it near the stove. You will not use this until step 5 but the egg yolks cooks pretty quickly so it is important to have this ready.240ml (1 cup) whole/ full-fat milk14g (1 tbsp) unsalted butter60g (4 tbsps) granulated white sugar
- Make the egg mixture. While waiting for the milk mixture to simmer, whisk together the egg yolks and the remaining 3/4 of the sugar in a separate bowl. Add the sifted flour to the egg yolk mixture. Mix again until smooth. Set aside.50g egg yolks20g (2½ tbps) all-purpose flour
- Temper the egg mixture. Gradually mix a small amount of the hot milk into the beaten eggs while constantly stirring. This slowly raises the temperature of the eggs, preventing them from cooking too quickly and curdling.Continue pouring half of the milk mixture slowly into the eggs, whisking thoroughly between additions. Then pour it all back into the saucepan to thicken.
- Cook the pastry cream. Still over medium-low heat, continue to whisk the mixture until it thickens. Whisk in the lumps until the pastry cream is smooth. When it has thickened to a pudding-like consistency, pause whisking every few seconds to check if the cream has come to a boil. Once you see large bubbles popping on the surface, whisk for about 10 more seconds then remove the pan from heat.
- Add flavoring. Add the vanilla extract/ vanilla bean paste. Stir until it has been evenly distributed.¼ tsp pure vanilla extract or vanilla bean paste
- Strain the pastry cream. This is the secret to a smooth, creamy, and lump-free pastry cream! Pour the cream into the strainer set over the bowl. Push it through the strainer using a spatula. This is to ensure that there are no bits of cooked eggs and any lumps that may be in your pastry cream.
- Cover and cool. Immediately cover the pastry cream with a piece of plastic wrap pressed against the surface of the cream to prevent a skin from forming. Let it cool in the fridge, about 1 to 2 hours, before using.
Prepare The Puff Pastry
- Preheat your oven at 400℉ (205℃).
- Working with one sheet of puff pastry at a time, cut into 6 equal squares. The more perfect the squares are, the easier it will be to shape the danish. Measure with a ruler if you like.1 box frozen puff pastry (thawed)
- Use a sharp knife to cut two a square border, leaving the top left corner and bottom right corner of dough connected.
- Fold one of the cut slits over to the opposite side. Then fold the other slit over to the opposite side. This should create a nice twisted diamond shape.
- Score the middle area with a fork to prevent it from rising too much.
- Lightly brush the edges with an egg wash. Whisk together the egg with 2 teaspoons of milk or water and use a pastry brush to apply. This helps the edges turn golden brown and glossy once baked.1 large egg + 2 tsp water or milk (for egg wash)
- Bake on the middle rack of the oven for 20-25 minutes, until evenly puffed with golden brown edges.
Make The Fruit Filling
- Purée about 1 cup of blueberry pie filling using an immersion blender – you should get a a thick, syrupy sauce. Add fresh blueberries and mix until they’re all coated with the sauce.1 cup blueberry pie filling454g (1 lb) fresh blueberries
Assemble The Fruit Danish
- Press down the middle of the baked pastry to create a well for your fillings. Place about 1-2 tablespoons of pastry cream and then top with our blueberry filling. Optional step is to drizzle with icing. (See Notes)


