This adorable mini Biscoff cheesecake is made in a muffin tin / cupcake pan! Easier to make than one large cheesecake, they taste as good as they look and a lot less messy to serve.
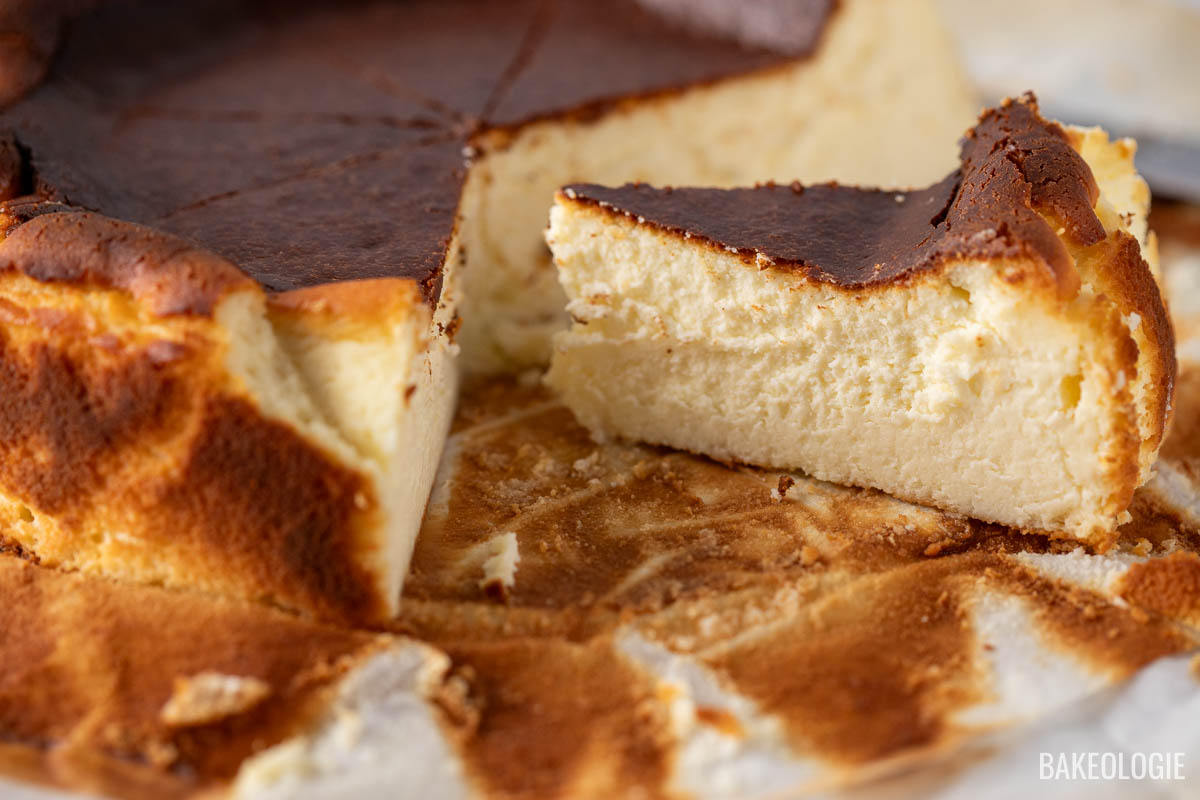
You might also love this mini basque cheesecake and pecan pie cheesecake.

Why You’ll Love This Recipe
Low effort, high impact. I am always on the lookout for desserts to serve on gatherings that are easy to make but will still have a “wow” factor. These mini Biscoff cheesecake will make an impact without the stress. Can you imagine everybody’s gushing reaction when you turn up at your next gathering with a platter of these petite treats??

Make-ahead. You can definitely make these two to three days ahead, but put the whipped cream and the halved Biscoff cookie on the day you’ll be serving them so they won’t soften in the fridge.
Easy to transport. Large cheesecakes are more fragile to make and transport. Just like cupcakes, these mini versions are easier to pack and transport due to their size.
Crowd pleaser. These cheesecakes are as good as it looks, not very sweet, and pairs perfectly with coffee or tea!

Ingredients & Substitutions
Shop efficiently (treat this as your grocery list) and gather your ingredients at home without running circles in your kitchen. (i.e. One trip to the fridge to get all your dairy needs.) You can still find the full printable recipe at the end of this post.

PRO TIP: The key to a creamy smooth and lump-free cheesecake filling is to ensure the cold ingredients are at room temperature.
DAIRY
- 60 grams melted butter, unsalted
- 500 grams cream cheese block
- Do not get the tub/ spreadable ones
- 100 grams egg (weight is without shell). Approximately 2 large eggs.
- 2 large egg yolks (Approximately 36 grams)
- 77 grams (1/3 cup) sour cream
- preferably 14% milk fat
- 230 grams (1 cup) heavy whipping cream / double cream
PANTRY
- 180 grams + plus extra (about 1/4 cup for the cheesecake topping) crushed Biscoff Cookies
- 1/4 teaspoon fine sea salt
- can also use regular table salt (no iodine)
- 150 grams + another 1 tablespoon (for the cheesecake topping) granulated white sugar
- 80 grams Biscoff Spread + 1 cup melted Biscoff spread
- 1 teaspoon pure vanilla extract
- 10 pieces Biscoff Cookies
Tools & Equipment
(affiliate links)
How To Make Mini Biscoff Cheesecake
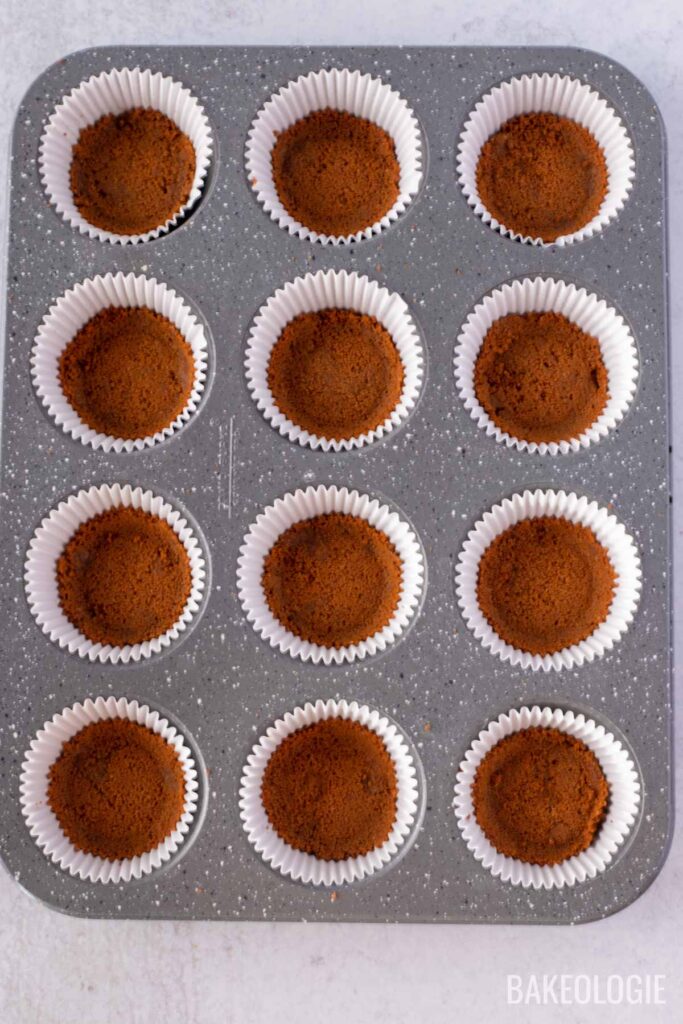
1. Make the Biscuit Base
Place the biscuits in a food processor and blitz until they become fine crumbs. It takes about 10 seconds in my food processor. Start by pulsing then blitz on high until done. Then add the melted butter and blitz again briefly to combine.
Don’t have a food processor? Just put the biscuits in a ziplock bag and bash using a rolling pin or large tin. It’s very satisfying!
The mixture should look like wet sand and holds together when you pinch it between your fingers.


Divide the mixture between paper muffin tin liners sitting in each hole. I filled 13 grams per hole.
Press and flatten the crumbs firmly into the base of each hole using something round with a flat base. A small glass or a 1/4 cup meausre are great options.
Bake for 10 minutes (325 F) then remove and cool for 10 minutes before topping with the cheesecake filling.

2. Make the Cheesecake Filling
The goal with the filling is to make it as smooth as you can yet beating as little possible. This will minimize the amount of air bubbles in the mixture so you don’t end up with bubbles or cracks on the surface.
Start by beating the ROOM TEMPERATURE cream cheese to stand mixer fitted with a whisk attachment and mix at medium speed (speed # 6) to cream. Then add the sugar, sour cream, Biscoff spread, vanilla extract, and the salt to the bowl and mix on medium until creamy. Scrape bowl down and mix until completely homogenous.


Add the eggs and yolks one at a time, allowing each to incorporate before adding the next. Scrape the bowl down and mix until completely smooth.
The cheesecake filling should be more like a thick pancake batter, rather than a muffin mixture that can be scooped into mounds.


Divide the mixture between the muffin tin holes. You can fill the holes up to 3 mm from the rim as the cheesecake does not rise much. I used 48 grams of batter per muffin hole.
I like to use an ice cream scoop with a lever. It’s very handy for muffins, cupcakes, pancakes, fritters …. AND LESS MESSY!


Bake at 325°F (160°C ) for 15 minutes. A lower temperature avoids browning on the surface while gently baking the delicate cheesecake filling.
Once baked, the filling should still be soft and supple in the centre, not rock hard. But not jiggling like there’s liquid underneath. If it’s too soft, pop it back in the oven for a few minutes.
Cool thoroughly on the counter for at least 1 hour. Once cooled, cover the surface with a sheet of baking/parchment paper then seal with cling wrap. Place in the fridge for at least 6 hours to fully set, preferably overnight.


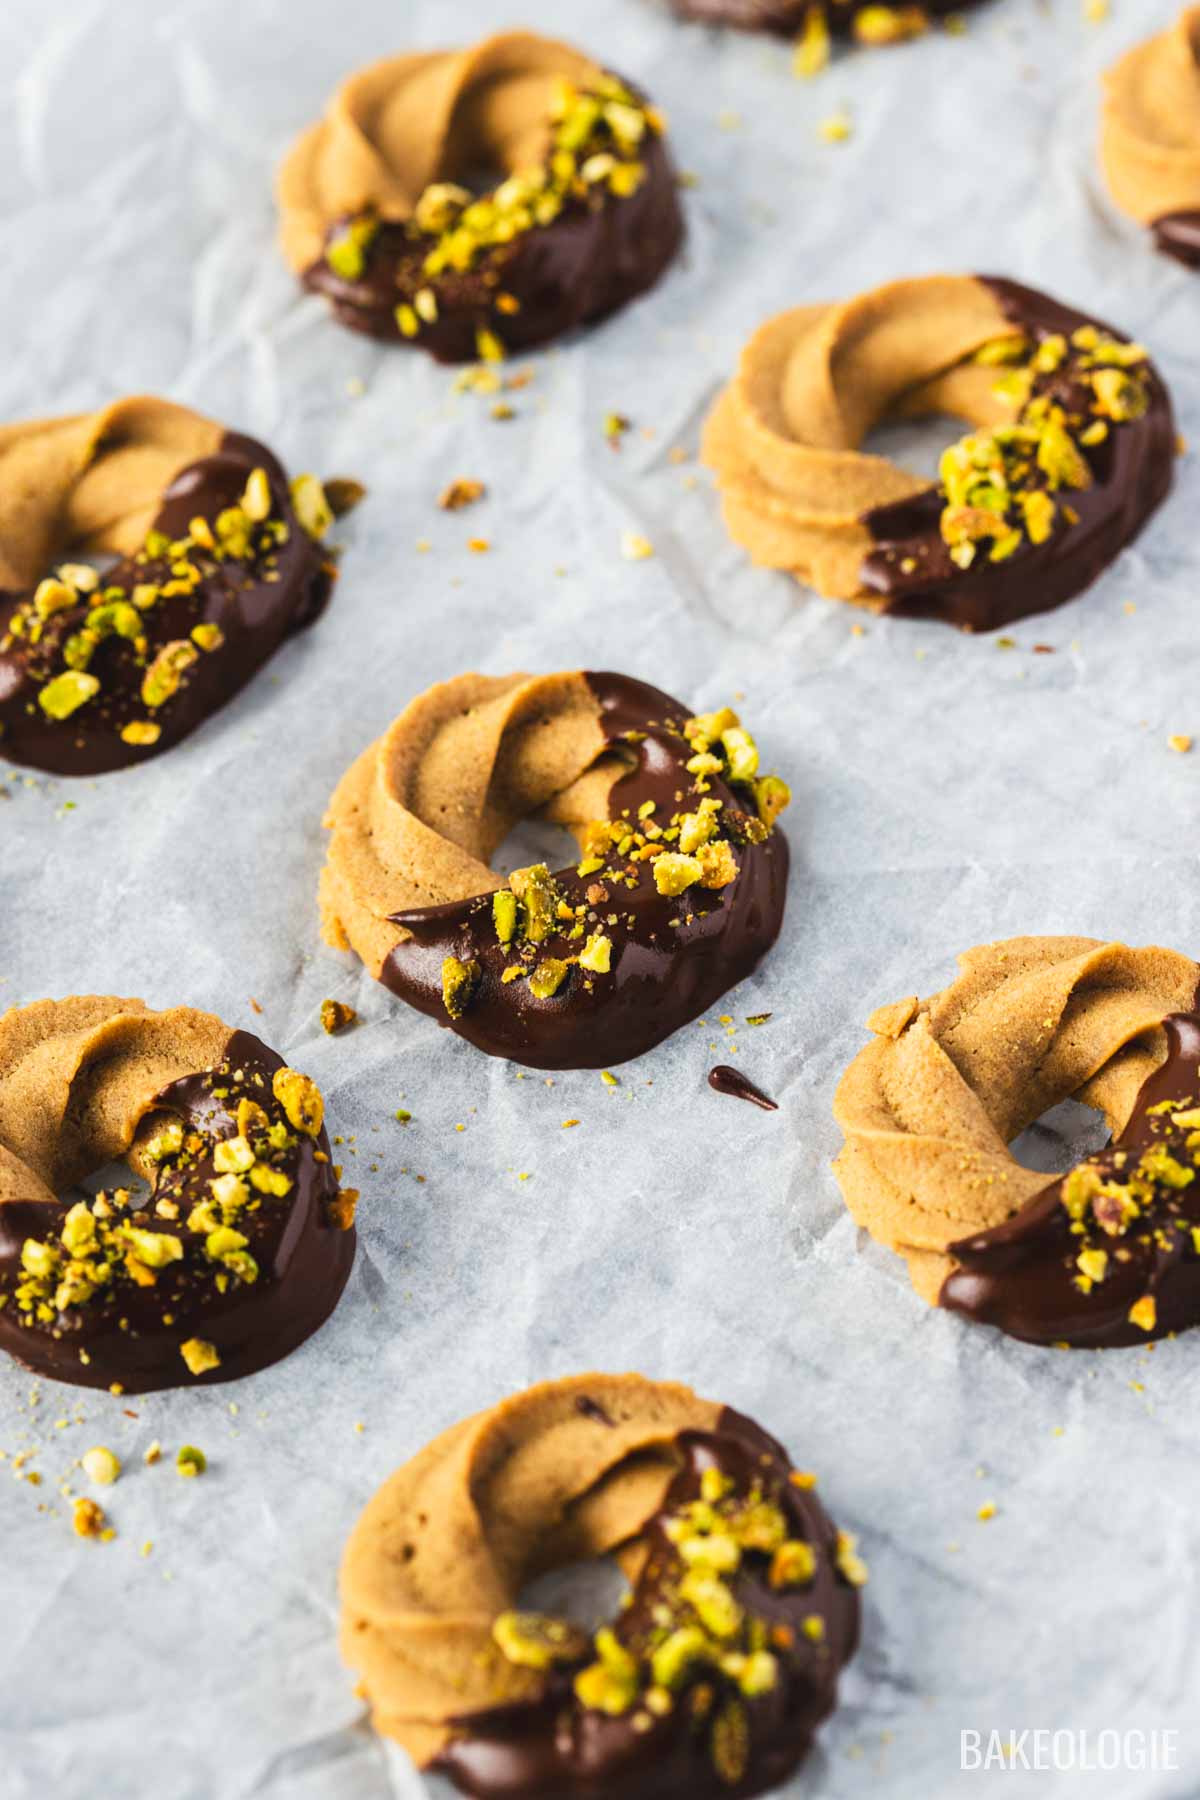
3. Decorate your mini Biscoff cheesecake
Once the mini cheesecakes are thoroughly chilled they will be set enough to pick up. Peel off the paper liner and place on a serving platter.
Decorate as you wish! In this recipe I used a lightly-sweetened whipped cream, melted cookie butter spread (just pop it in the microwave in 15 second increments until they are melted or pourable), more crushed Biscoff cookies and halved Biscoff cookies for crunch and height.


For each individual cheesecake, pour about 1 tablespoon of melted Biscoff spread (Place the Biscoff spread in a bowl and warm in the microwave until its pourable.), pipe some cream (I use a large round nozzle – tip 2A, or any piping tip you have, or you could also just dollop the cream on using spoons), then top with a biscoff cookie and sprinkle some Biscoff crumbs.
Isn’t this individual treat so adorable?!?

Storage And Serving
Storage: Keep them in the fridge. They’re excellent for 24 hours after making, and still very, very good at 48 hours. If needed it keeps for 5 days at least, probably longer but the base will start to get softer than is ideal, still delicious to eat though.
Freezing: If you plan to freeze these individual desserts, after the cheesecakes have cooled, freeze them in a tightly sealed container for up to 3 months. Place in the fridge for thawing overnight, then start the decorating process on the day your will be serving them.
Serve at room temperature. Cheesecake is creamier and you can taste more flavours when it’s at room temperature. Though on warm summer days cold cheesecake from the fridge is a delight!

FAQs for Mini Biscoff Cheesecake
Can I make this ahead?
You can definitely make this up to 2 days ahead but leave the decorating on the day you will serve them.
Regular freshly whipped cream deflates with time so try to assemble as close to serving as you can. You can assemble them and leave in the fridge for a few hours though.
I don’t have a cupcake/liner, can I skip it?
I don’t recommend baking the cheesecake directly in the pan as it will be difficult to remove the cheesecakes without breaking them.
Can I make this without a stand mixer or a hand mixer?
Absolutely. Just make sure the cream cheese is quite soft then just use a handheld whisk / wooden spoon. It works because we aren’t trying to fluff up the cream cheese like we do with butter for things like buttercream frosting. All we want is to make the cream cheese smooth.

How to make my cream cheese to room temperature?
The easiest and best way to soften cream cheese is to simply allow it to sit at – room temperature. Mine takes around 2 hours, longer if it’s during winter time as my kitchen is colder.
However, I understand that this method usually means that you have a bit of a plan in place. So here’s a tip to bring your cream cheese to room temperature faster:
Cut cream cheese into small cubes and spread out on the packaging or a plate, making sure they aren’t touching. The smaller the cubes, the quicker the cream cheese will soften. Leave them at room temperature for about an hour (depending on how warm your house is) or until soft to the touch .
❤️ Tried this recipe and loved it? If you made this recipe or any other recipe on this site, please leave a ⭐️⭐️⭐️⭐️⭐️ rating + review below – or tag @thebakeologie on Instagram and hashtag it #bakeologie !

Equipment
- muffin / cupcake liners
- Muffin Tin or Cupcake pan
- Large Cookie/ Ice Cream Scoop optional
Ingredients
For the Biscuit Base
- 180 grams Crushed Biscoff Cookies
- 60 grams melted butter weigh before melting
For the Cheesecake Filling
- 500 grams cream cheese block at room temperature
- 150 grams granulated white sugar
- ¼ tsp sea salt
- 80 grams Biscoff spread
- 77 grams (1/3 cup) sour cream preferably 14% milk fat
- 1 teaspoon pure vanilla extract
- 100 grams (about 2 large eggs) eggs weight is without shell
- 2 (about 36 grams) large egg yolks
For the Cheesecake Topping
- 1 cup heavy whipping cream or double cream
- 1 tablespoon granulated white sugar
- 10 pieces Biscoff Cookies
- ¼ cup crushed Biscoff cookies
- 1 cup melted Biscoff spread
Instructions
- PREP. Preheat oven to 325°F / 160°C with the rack in the middle of oven. Line a standard muffin tin with paper muffin/cupcake liners. You would need 17 pieces of liner.
BISCUIT BASE
- COOKIE CRUMBS. Place the biscuits in a food processor and blitz until they become fine crumbs. It takes about 10 seconds in my food processor. Start by pulsing then blitz on high until done. Then add the melted butter and blitz again briefly to combine. The mixture should look like wet sand and holds together when you pinch it between your fingers.180 grams Crushed Biscoff Cookies60 grams melted butter
- PRESS. Divide the mixture between paper muffin tin liners sitting in each hole. I filled 13 grams per hole. Press and flatten the crumbs firmly into the base of each hole using something round with a flat base. A small glass or a 1/4 cup meausre are great options.
- BAKE. Bake for 10 minutes (325 F) then remove and cool for 10 minutes before topping with the cheesecake filling.
CHEESECAKE FILLING
- FILLING. Start by beating the ROOM TEMPERATURE cream cheese to stand mixer fitted with a whisk attachment and mix at medium speed (speed # 6) to cream. Then add the sugar, salt, Biscoff spread, vanilla extract, and sour cream to the bowl and mix on medium until creamy. Scrape bowl down and mix until completely homogenous.500 grams cream cheese block150 grams granulated white sugar¼ tsp sea salt80 grams Biscoff spread1 teaspoon pure vanilla extract77 grams (1/3 cup) sour cream
- ADD EGGS. Add the eggs and yolks one at a time, allowing each to incorporate before adding the next. Scrape the bottom and sides of the bowl and mix until completely smooth.NOTE ON CONSISTENCY: The cheesecake filling should be more like a thick pancake batter, rather than a muffin mixture that can be scooped into mounds.100 grams (about 2 large eggs) eggs2 (about 36 grams) large egg yolks
- DIVIDE. Divide the mixture between the muffin tin holes using an ice cream scoop. You can fill the holes up to 3 mm from the rim as the cheesecake does not rise much. I used 48 grams of batter per muffin hole.
- BAKE. Bake at 325°F (160°C ) for 15 minutes. A lower temperature avoids browning on the surface while gently baking the delicate cheesecake filling.Once baked, the filling should still be soft and supple in the centre, not rock hard. But not jiggling like there’s liquid underneath. If it’s too soft, pop it back in the oven for a few minutes.
- CHILL. Cool thoroughly on the counter for at least 1 hour. Once cooled, cover the surface with a sheet of baking/parchment paper then seal with cling wrap. Place in the fridge for at least 6 hours to fully set, preferably overnight.
DECORATE
- DE-CHILL: If you got the time, take out the cheesecakes from the fridge 30 minutes prior to serving, to remove some of the fridge chill (the cheesecake is nicer at room temperature).
- MAKE THE WHIPPED CREAM. Place the heavy whipping cream and sugar in a bowl and beat on high until the cream is thick enough to pipe/dollop.1 cup heavy whipping cream or double cream1 tablespoon granulated white sugar
- DECORATE. Peel off the paper liner and place on a serving platter. For each individual cheesecake, pour about 1 tablespoon of melted Biscoff spread (Place the Biscoff spread in a bowl and warm in the microwave until its melted/ pourable.), pipe some cream (using a large round nozzle or any piping tip you have, or you could also just dollop the cream on using spoons), then top with a biscoff cookie and sprinkle some Biscoff crumbs.10 pieces Biscoff Cookies1 cup melted Biscoff spread¼ cup crushed Biscoff cookies

Thank you for the recipe! Made this recently for a barbecue and everyone loved these pretty mini cheesecakes! They are rich but not very sweet.