Pistachio Kataifi (Dubai Chocolate Bar Filling)

Crispy, nutty, Dubai-style crunch.

Bowl of toasted kataifi mixed with pistachio filling, showing the green, shredded mixture being stirred with wooden and silicone spatulas. A bowl of plain toasted kataifi sits beside it on a light surface.

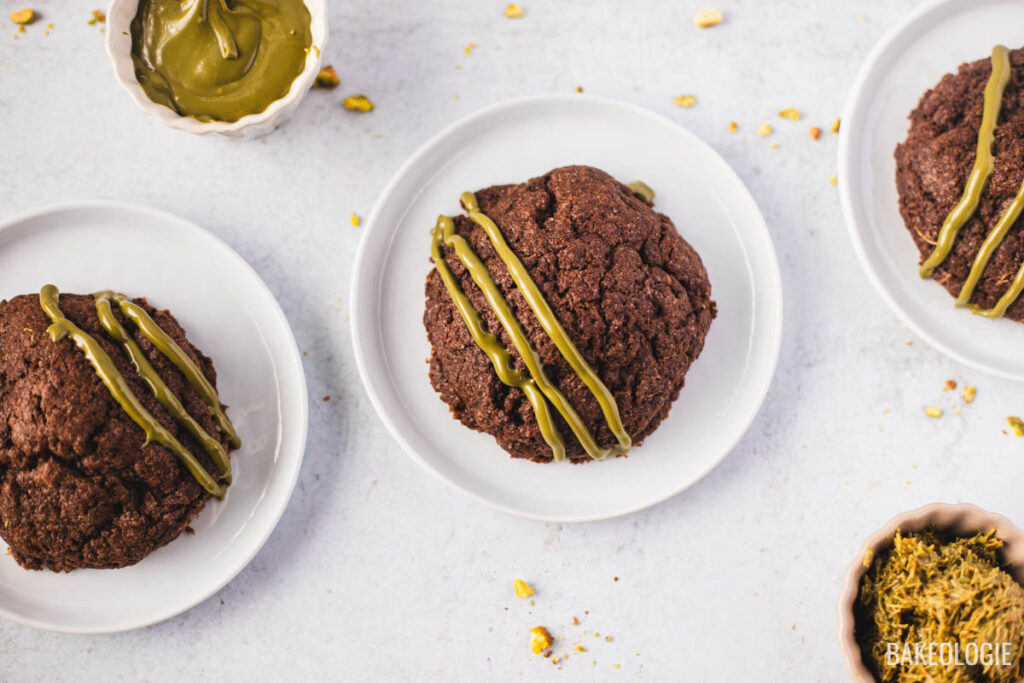
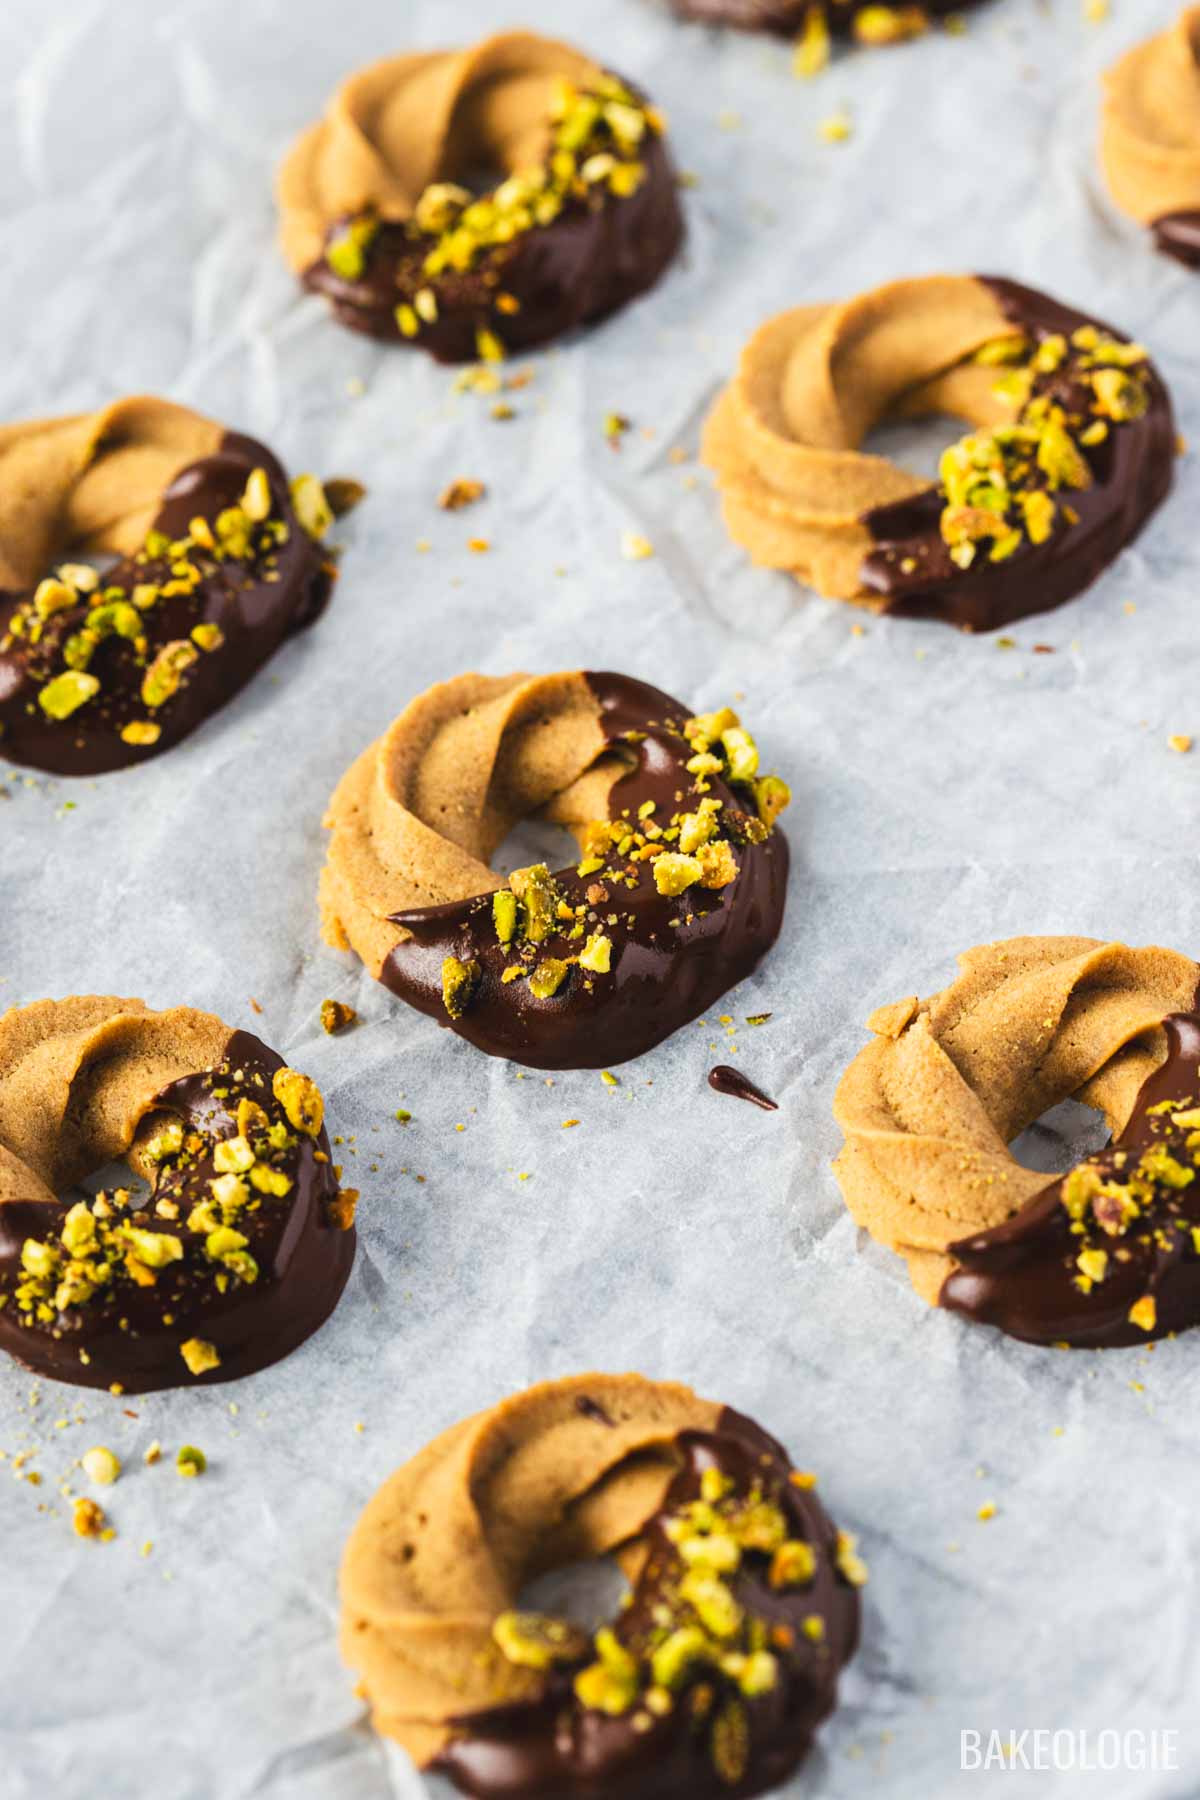
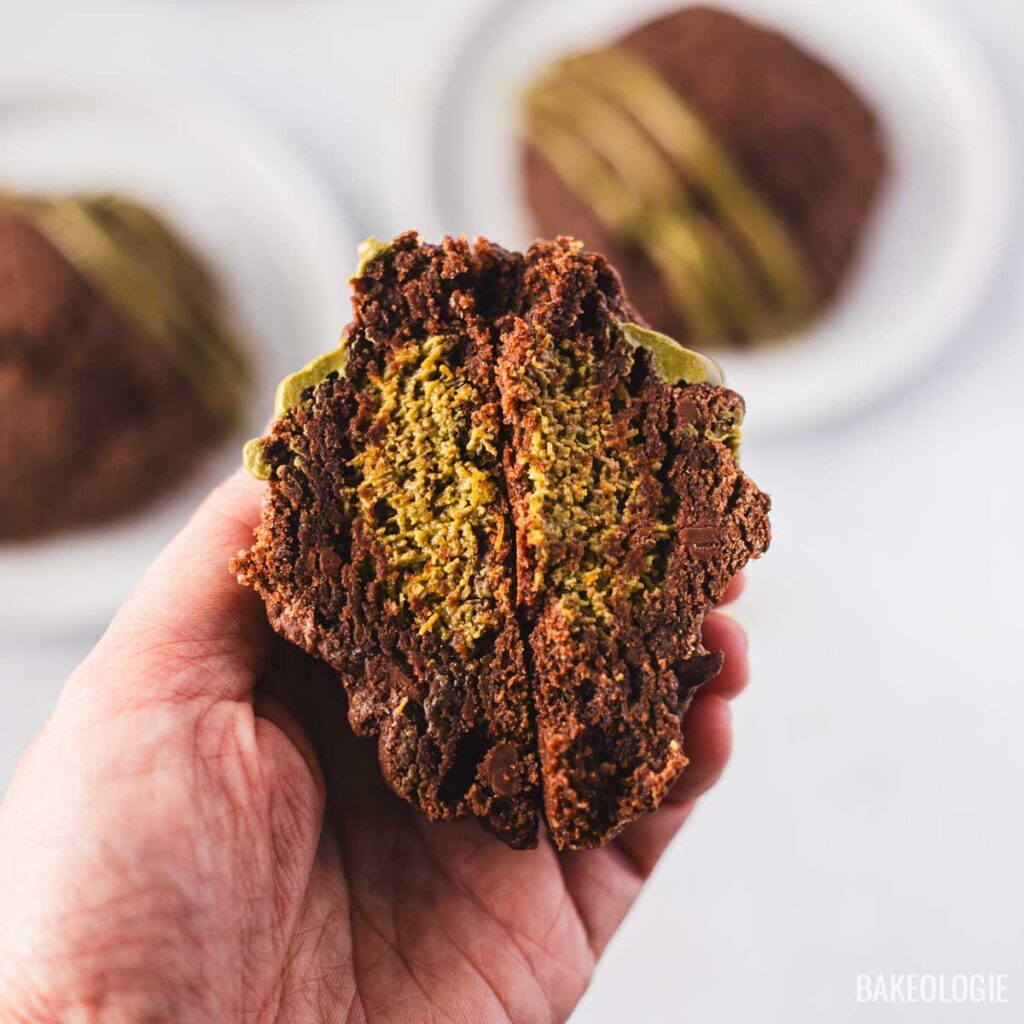
If you’ve ever bitten into a Dubai-style pistachio chocolate bar or cookie and wondered what that irresistible crispy layer is, this pistachio kataifi is the magic ingredient. Kataifi dough gets fluffed, coated in butter, and toasted—either in the oven for an even, hands-off crisp or on the stovetop for a quick, small-batch toast—until golden and shatter-crispy, then folded with pistachio cream or pistachio paste. The result is an addictive, crunchy pistachio filling that instantly elevates anything you add it to—from stuffed cookies to chocolate bark to cheesecake toppings.

It’s fast, beginner-friendly, and stores beautifully, making it the perfect component recipe for your Middle Eastern–inspired desserts. You can try it inside my Dubai Chocolate Cookies (link here), where it adds that signature bite and pistachio crunch Dubai desserts are known for.

Close-up of a bucket filled with glossy green pistachio filling, with a wooden spatula dipped into the smooth mixture.
Be sure to stir your pistachio cream before using to evenly distribute the oil.
Three Dubai Chocolate Cookies on white plates, each with a crackly chocolate top and drizzled with glossy pistachio chocolate. Small bowls of pistachio filling and chopped pistachios sit nearby, with crumbs scattered on a light background.
My Dubai Chocolate Cookies filled with Pistachio Kataifi.

Yield
1½ cups

Prep Time
10 mins

Cook Time
10-12 mins

Print Recipe | Pin Recipe

Ingredients

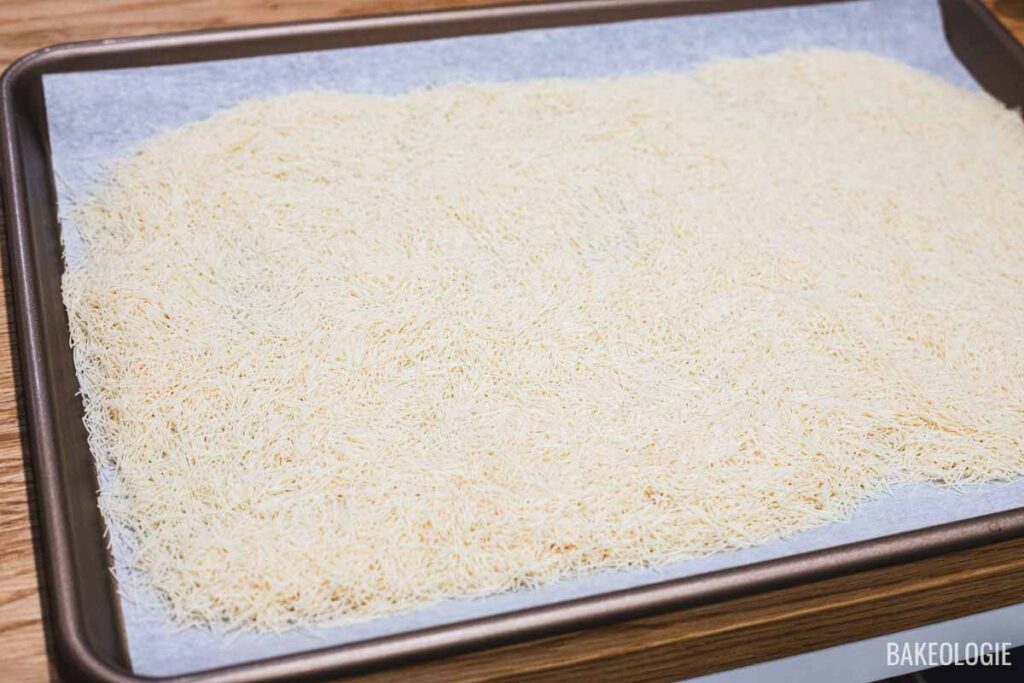
  • 60g (1 cup) dried kataifi, shredded/fluffed into strands.
  • 28g (2 tbsps) melted, unsalted butter
  • 280g (1 cup) pistachio cream/ pistachio paste

Instructions

Step 1OVEN METHOD.

Toast the kataifi. Preheat your oven to 350°F (175°C). Spread the kataifi on a baking sheet and gently fluff it with your fingers to separate the strands..

Dried kataifi strands spread in an even layer on a parchment-lined baking sheet, ready to be toasted in the oven.

Step 2.

Add the melted butter. Drizzle 2 tablespoons melted butter over the kataifi. Toss lightly with your hands or a spatula until the strands are lightly coated — they should look barely glossy, not wet.

  • 28g (2 tbsps) melted, unsalted butter

Step 3.

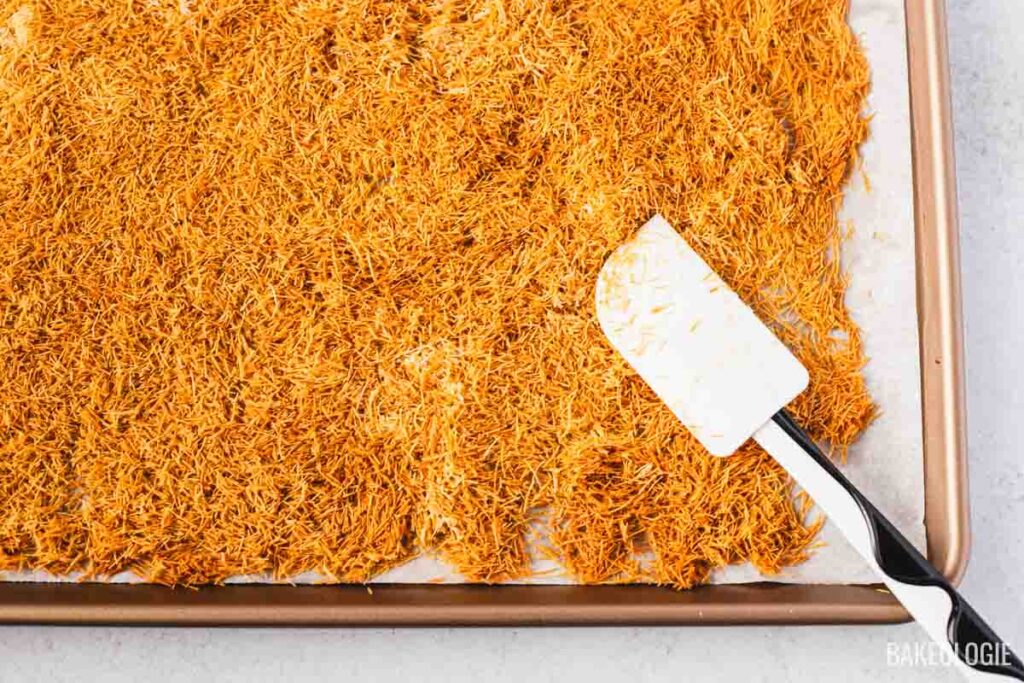
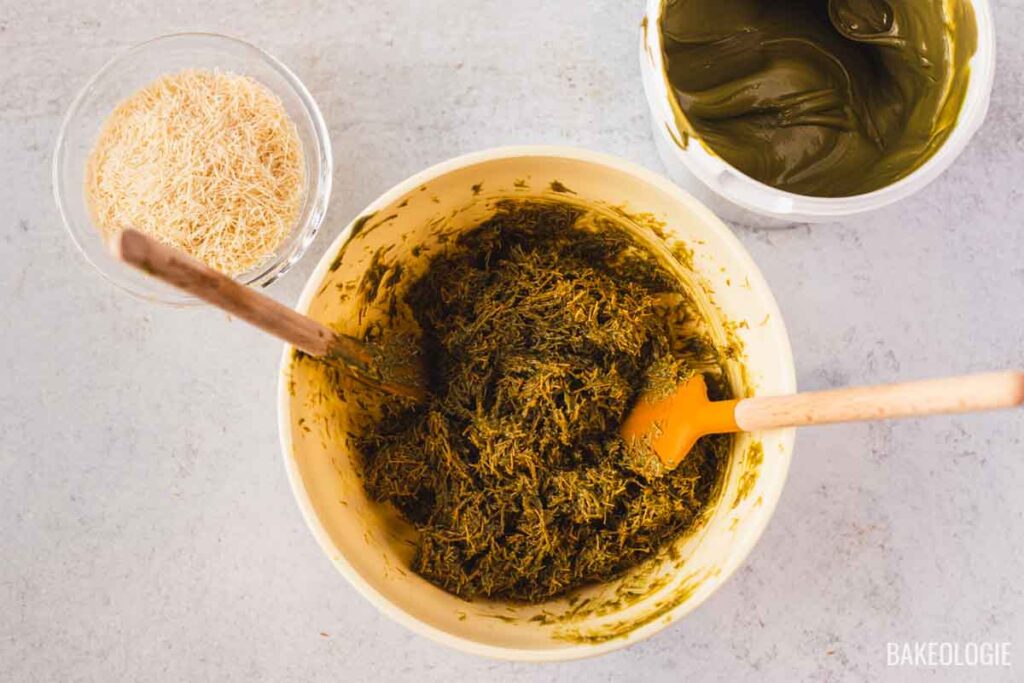
Bake until crisp. Toast for 8–10 minutes, stirring halfway, until fragrant and lightly golden. Let cool completely; the kataifi will crisp up even more as it cools.

Golden, deeply toasted kataifi strands on a baking sheet, with a spatula showing the crisp, flaky texture.

    Step 4.

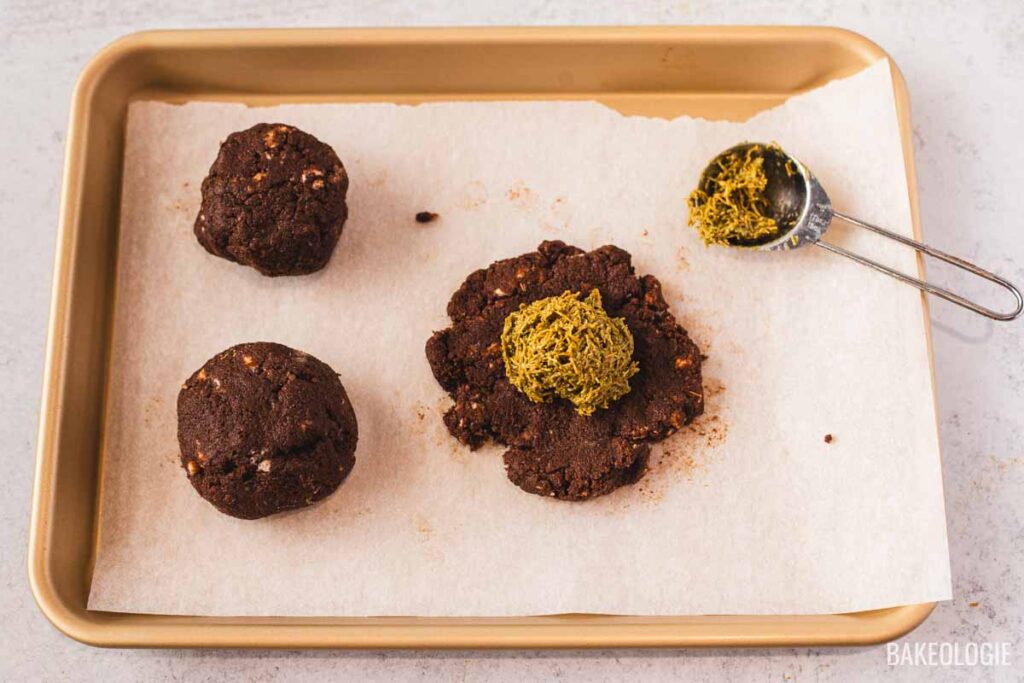
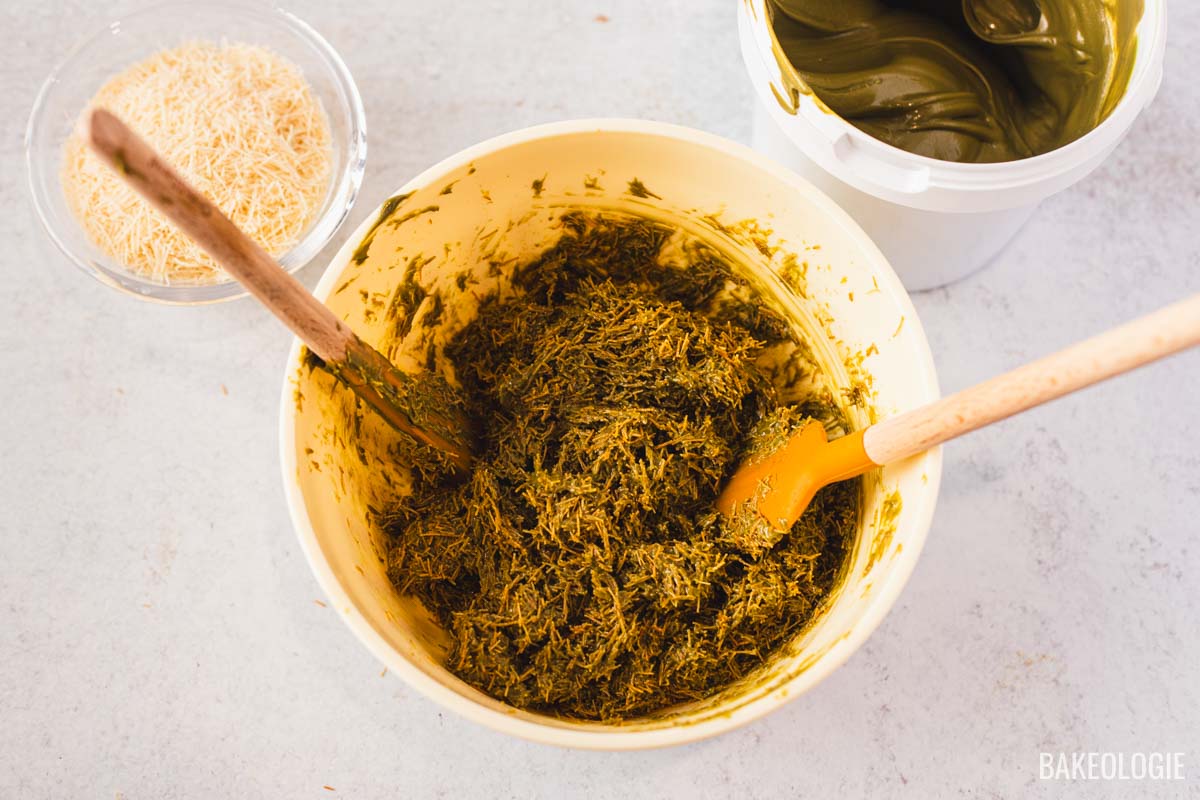
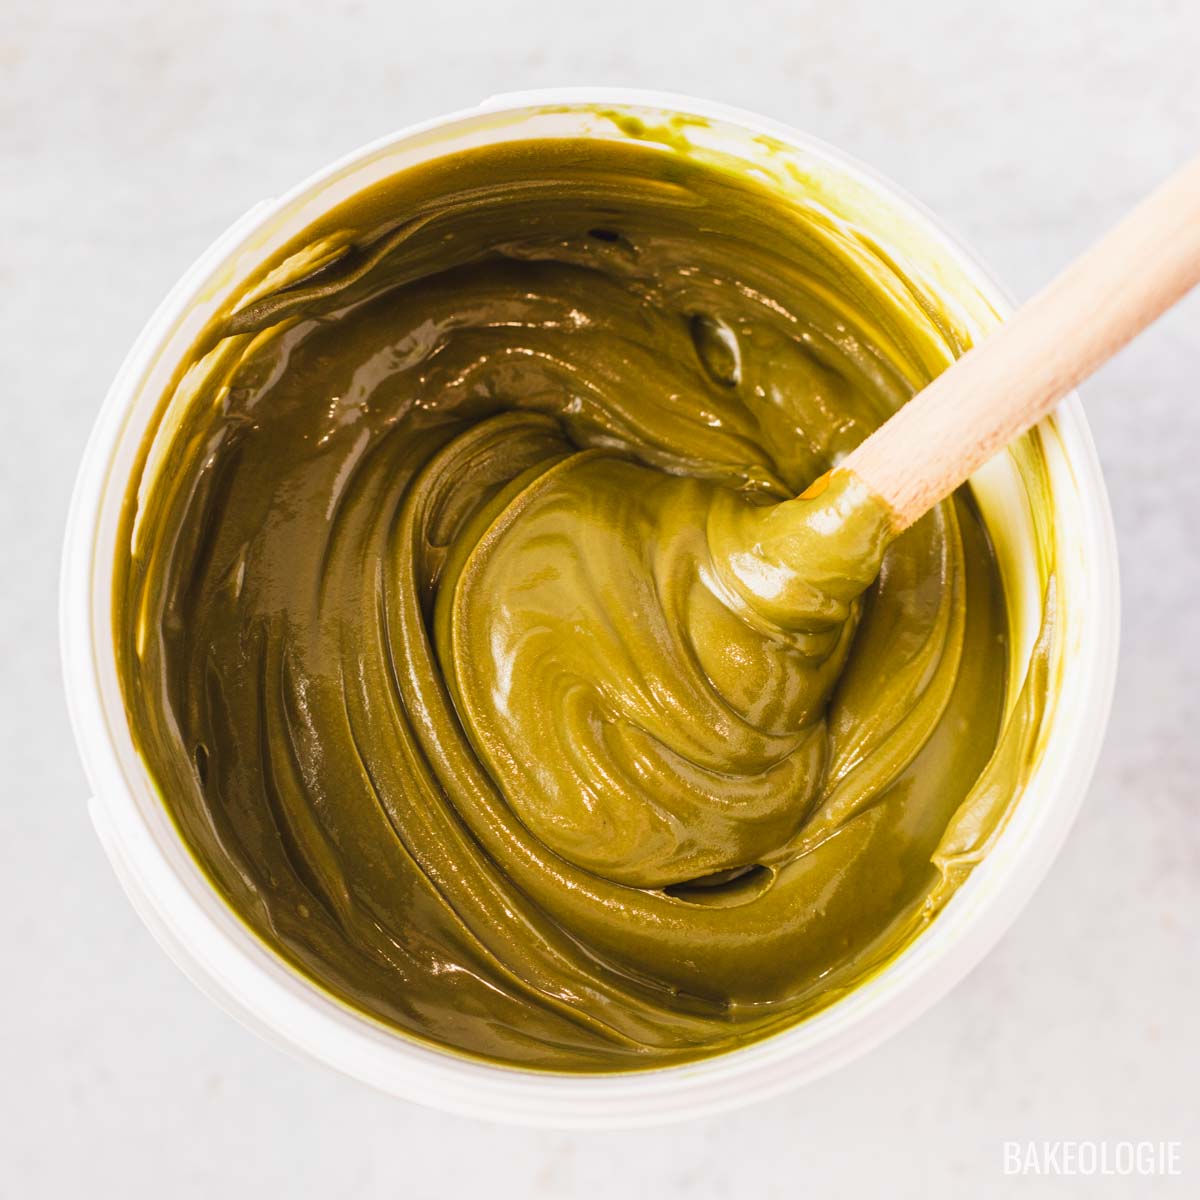
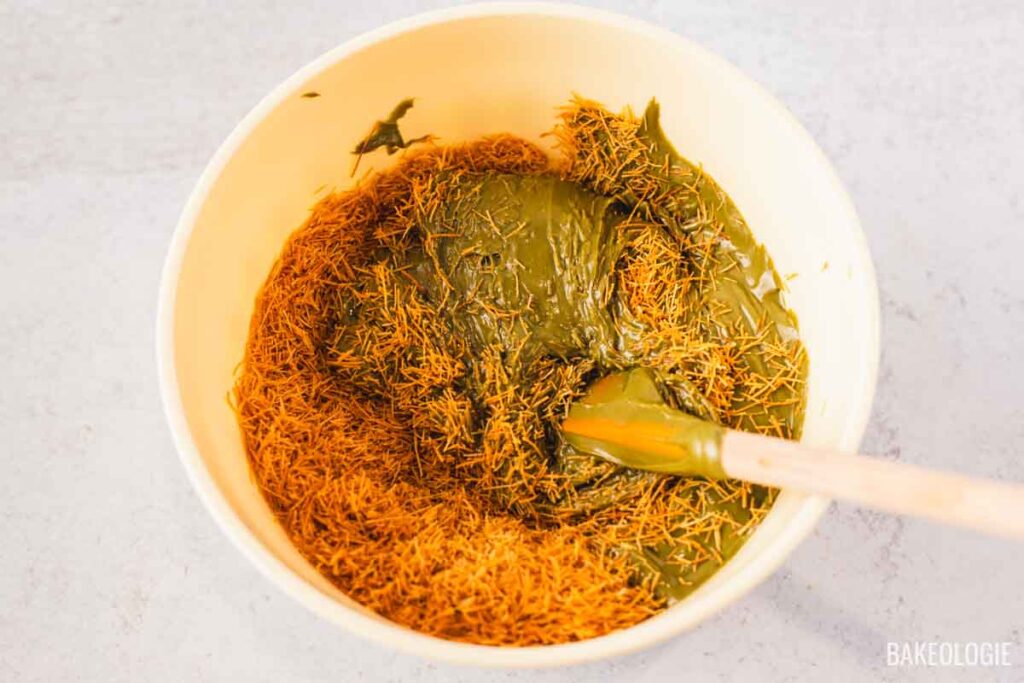
    Combine with pistachio cream. Place the toasted kataifi in a bowl and mix with pistachio cream until evenly coated.The mixture should be textured, crunchy, and slightly sticky from the pistachio cream.

    Toasted kataifi being mixed into smooth pistachio cream in a large bowl, with a spatula folding the strands into the mixture.

    Step 5.

    Use immediately or store. Use as a filling for Dubai Chocolate Cookies (link here) or any dessert needing a crunchy pistachio center.

    Pistachio kataifi stores best at room temperature. Keep it in an airtight container and it will stay fresh for about three to four days—just make sure it’s kept in a cool, dry spot, as humidity can soften the crunch. Avoid refrigerating it, since the moisture in the fridge will make the kataifi lose its crispness and can thicken the pistachio cream in an unpleasant way. (See Notes for more info on storage.)

    Bowl of pistachio kataifi filling being mixed until fully combined, with toasted kataifi strands and pistachio cream visible in the background.

    STOVETOP METHOD:

    Spread the kataifi in a large skillet in a thin, even layer—avoid overcrowding so it toasts evenly. Drizzle the melted butter over the kataifi and use your hands or tongs to lightly toss the strands so they’re just coated.

    Place the skillet over medium heat and begin gently stirring and tossing the kataifi continuously, as it can brown quickly. At first the strands will feel soft and a bit tricky to move, but as they cook they’ll become lighter, crispier, and easier to stir.

    Keep toasting until the kataifi turns a deep golden brown; don’t pull it off the heat too early, because the longer it toasts, the crunchier it becomes. This process usually takes 5–10 minutes.

    Once done, transfer the kataifi immediately to a bowl to stop the cooking—leaving it in the hot pan will cause it to continue browning.


    Baker’s Notes

    About dried kataifi: This recipe uses dried kataifi, which comes fully dehydrated, shelf-stable, and ready to use. It’s much more convenient because you don’t have to thaw it or worry about moisture. Simply break it apart with your fingers to loosen the strands and you’re good to go. Dried kataifi toasts faster and more evenly than the fresh/frozen kind, making it ideal for quick crisp fillings like this one.

    If using frozen or chilled kataifi dough: Readers may find kataifi sold in the freezer section (the more traditional version). If using frozen kataifi, thaw it completely in the fridge, then let it sit at room temperature for 20–30 minutes. Cover it with a lightly damp towel to prevent it from drying out. Before toasting, gently pull the strands apart—they tend to clump more than dried kataifi. Chilled/fresh kataifi behaves the same as thawed frozen kataifi and must be fluffed very well for even toasting.

    How to prep the strands: Whether dried or frozen/thawed, always fluff the kataifi before toasting. Use your fingertips to gently separate the strands into a loose, airy pile. This ensures even browning and that signature delicate crunch.

    Oven vs. stovetop toasting: Both methods are included in this recipe. The oven method gives a hands-off, evenly golden result—perfect for larger batches. The stovetop method is faster, great for small amounts, and gives you more control (with more active stirring). Dried kataifi browns more quickly than thawed kataifi, so keep a close eye on it either way.

    Choosing pistachio cream vs. pistachio paste: Pistachio cream creates a soft, glossy, dessert-shop style filling. Pistachio paste yields a thicker, more intense pistachio flavor. If your paste is too thick, loosen it with a little warm cream or melted white chocolate.

    Storage (Room Temperature): Pistachio kataifi stores best at room temperature. Place it in an airtight container and keep it in a cool, dry spot for 3–4 days. Avoid the fridge—moisture softens the kataifi and makes the pistachio cream stiff and dull.

    Storage (Freezer): Freeze for up to 1 month in a sealed container or bag, laying it flat so it doesn’t clump. Thaw uncovered at room temperature to prevent condensation. If it loses crunch, refresh it in a 300°F (150°C) oven for 3–4 minutes, then cool fully before using.

    Keeping the crunch: Let the toasted kataifi cool fully before mixing with pistachio cream. Warm kataifi traps steam and softens. Also avoid storing it near heat or humidity—crisp strands thrive in a dry environment.

    Best uses: This pistachio kataifi is perfect for stuffing Dubai Chocolate Cookies, layering into chocolate bark, adding crunch to cheesecakes or no-bake desserts, or sprinkling over ice cream, yogurt bowls, and parfaits.


    Whisk, Snap, and Share

    This space isn’t just for our photos — We’d love to feature yours too! If you’ve made this recipe, tag us on Instagram @thebakeologie or email your photo to [email protected] with the recipe name in the subject line.

    📸 By sending a photo, you’re giving permission to feature it here.


    You Might Like:

    Leave a Reply

    Your email address will not be published. Required fields are marked *

    This site uses Akismet to reduce spam. Learn how your comment data is processed.